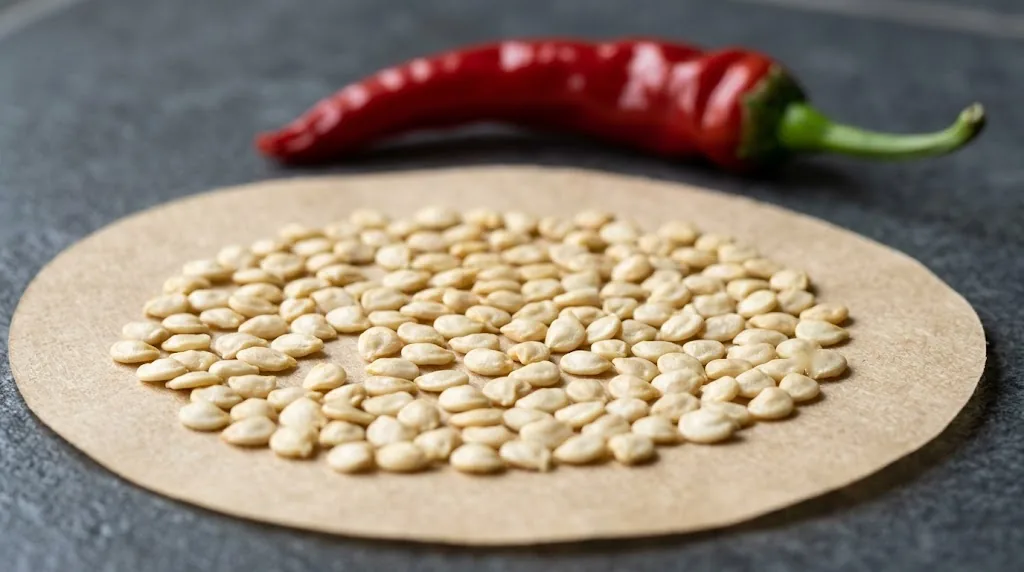
Learning how to save seeds from peppers is one of the most rewarding skills in the home garden. When you find a chili variety with exceptional flavor, productive plants, and the exact heat level you love, saving seed lets you grow that exact favorite year after year without buying new commercial packets. Collecting seed also allows you to select for traits that thrive in your specific microclimate and soil conditions, whether you grow sweet peppers or fiery heirloom selections.
Chili peppers belong to the genus Capsicum, a group of flowering plants with several wild species native to the Americas. While the physical process to remove the seeds is straightforward, maintaining variety purity requires thoughtful botanical care. Chili flowers usually self-pollinate, but visiting insects can carry pollen between neighboring varieties. Without intentional isolation, the seeds you gather at the end of the season might produce surprising, unpredictable fruit next summer. If you want true-to-type plants every spring, understanding how to isolate blossoms, select healthy fruit, and properly dry and store pepper seeds makes all the difference.
For gardeners looking for a full roadmap to how to grow chili peppers from spring sowing to final autumn harvest, seed saving represents the rewarding final stage that closes the full garden loop.
Why You Cannot Grow Peppers from Hybrid Pods for True Seed
To successfully save pepper seeds that remain pure, every home grower needs to understand plant genetics. Heirloom and open-pollinated pepper varieties breed true to type when self-pollinated. In contrast, commercial F1 hybrid peppers are intentional first-generation crosses between two distinct parent lines. If you save seeds from a hybrid pod, the resulting seedling generation will split into varied forms, often lacking the vigor, uniform shape, or distinct heat of the parent pod.
Another factor is the pepper species itself. Most common garden pepper varieties belong to one of three domesticated species:
- Capsicum annuum: Includes jalapenos, bell peppers, serranos, poblanos, and cayennes.
- Capsicum chinense: Includes habaneros, Scotch bonnets, and super-hot cultivars like ghost peppers and Carolina Reapers.
- Capsicum baccatum: Includes South American aji varieties such as Aji Lemon Drop and Bishop’s Crown.
Pepper flowers are largely self-pollinating, yet insects can move pollen between nearby compatible varieties. Growing them side by side increases the risk of a cross without making one inevitable. Even between separate species, occasional crosses can occur. If your goal is reliable seed saving, you must control how pepper flowers receive pollen.
How to Prevent Cross-Pollination and Save Pure Seeds
A healthy pepper plant produces perfect flowers, meaning each bloom contains both male anthers and female stigmas. Under still indoor air or gentle wind, pepper blossoms are largely self-pollinating. However, bumblebees, honeybees, and solitary pollinators visit open blooms across the entire plant and transfer pollen across dozens of yards, easily creating unintended crosses.
Commercial seed growers preserve purity by isolating varieties by hundreds of yards, but home gardeners rarely have that much space. Fortunately, simple physical barriers prevent cross-pollination completely:
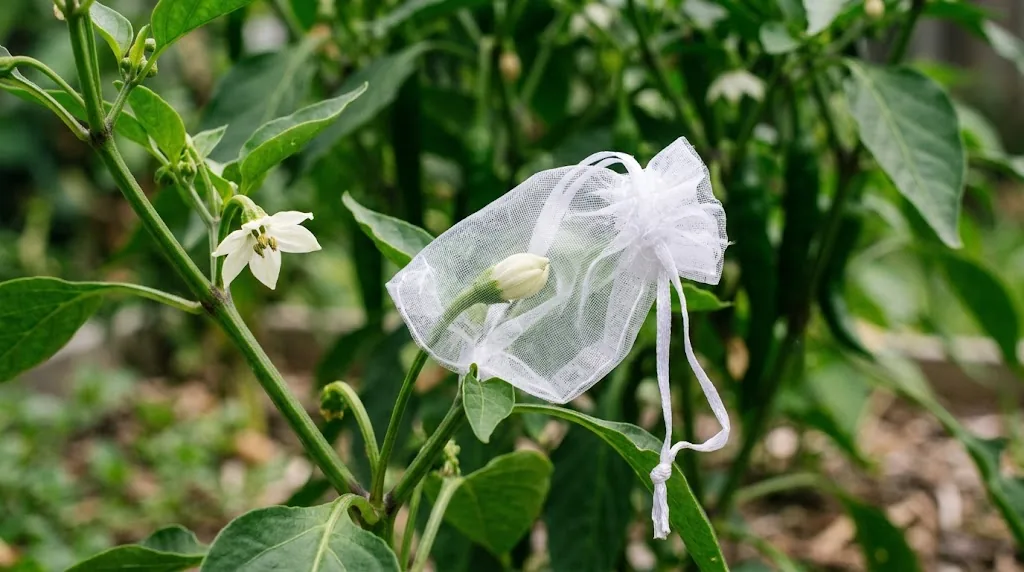
- Organza bags or jewelry bags: Slip small drawstring organza bags over immature flower buds before they open. Cinch the cord tightly around the stem to exclude visiting insects. Once the blossom opens inside the bag, gently tap or shake the stem to help the flower pollinate itself.
- Hand pollination: If you want to assist pollination, open the bag briefly in the morning when the flower opens and brush pollen across the stigma using a small paintbrush or cotton swab, then promptly reclose the bag.
- Marking the isolated pod: Once the petals drop and a tiny green chili pod begins to swell, remove the bag and tie a brightly colored piece of yarn or flagging tape to the stem. This ensures you only collect seeds from that specific, protected fruit.
Selecting the Best Pods for Seed Saving
Always gather seed from plants that produce fruit vigorously and remain free of disease, because you want to preserve the most resilient garden genetics.
Timing is critical when you harvest peppers for seed saving. Immature green peppers, while tasty in the kitchen, contain pale, immature seeds that will fail to germinate. You must allow selected pods to ripen fully on the vine until they reach full maturity and display their final color, whether brilliant red, deep orange, golden yellow, or chocolate brown.
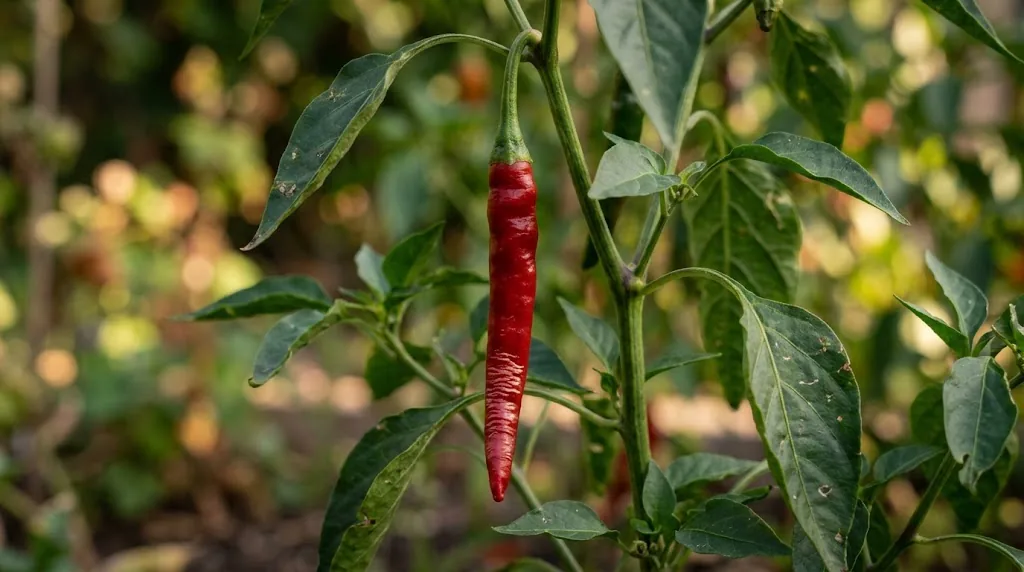
For culinary use, you pick peppers as soon as they reach full color. But to obtain mature seeds with maximum vitality, allow the fruit to become slightly overripe on the vine. The pod skin may even start to wrinkle slightly, signaling that the seeds inside are fully mature and packed with stored energy.
If you want clear guidance on identifying peak pod maturity across various cultivars before gathering fruit, review these practical steps for how to harvest red chili peppers cleanly without damaging parent branches.
Step-by-Step: Extracting Chili Seeds Safely
Once you bring your fully ripe pods indoors, taking the seeds out of the pepper requires only simple kitchen tools and basic precautions. Capsaicin, the pungent compound responsible for heat in hot peppers, concentrates heavily along the internal placenta and white ribs where seeds attach.
Follow these steps to de-seed and extract seeds cleanly and safely:
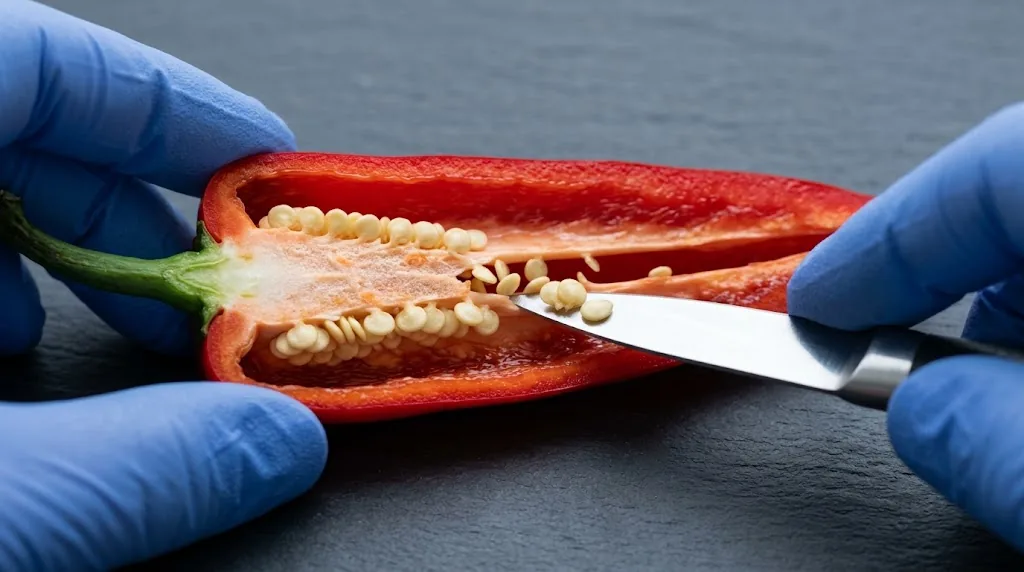
- Wear protective gear: Always wear gloves, preferably nitrile, when handling pungent pods. Avoid touching your eyes or nose during processing. If handling exceptionally hot cultivars, work in a well-ventilated area.
- Cut open the pod: When you open a pepper, slice the pod lengthwise from stem to tip, or cut them open around the top of the pepper just below the stem cap, to expose the central seed core.
- Scrape the seeds free: Use the dull back of a paring knife or a small spoon to gently scrape the seeds off the central placenta into a clean bowl. Make sure the seeds remain unbruised during extraction.
- Separate pulp and debris: Pick out any clinging fragments of wet flesh. Unlike tomatoes, chili seeds do not require wet fermentation. A simple dry separation is all you need.
How to Dry Seeds and Preserve Chilli Pod Viability
Proper drying is essential to protect seed longevity and prevent mold. Wet seeds stored in sealed containers will quickly spoil. Small, thin-walled pepper varieties may dry naturally inside whole pods, but for fleshy varieties, you must extract and dry seeds separately.
Carefully spread the seeds in a single layer across an absorbent surface. Unbleached coffee filter paper or uncoated paper plates work far better than standard paper towels, which tend to stick stubbornly to wet seeds as they dry. Label the edge of the filter immediately with the variety name, whether sweet bell, jalapeno, or hot chilli, along with the date.
Place the seeds in a warm, dry place with good airflow, strictly away from direct sunlight. Direct heat from ovens, food dehydrators, or sunny windowsills can overheat the delicate internal embryo and ruin seed viability. Let them dry undisturbed for 10 to 14 days.
To confirm that seeds are completely dry, perform the snap test: take one seed and attempt to bend it between your fingernails. If it bends or feels spongy, moisture remains inside and drying must continue. Fully dry seeds will snap crisply under pressure.
Testing Viability Before Storage
Before sealing a batch of saved pepper seeds, testing seed germination and overall viability ensures you keep only high-quality stock ready for next season.
A quick preliminary check is the water float test. Place your dry seeds in a small glass of room-temperature water. Heavy, fully developed viable seeds will sink to the bottom within several minutes. Light, hollow seeds will float on the surface and can be skimmed off and discarded. If you use this test, make sure to dry the sunken seeds thoroughly once more before long-term storage.
For older batches or rare varieties, you can run a paper towel sprouting test. Moisten a clean paper towel with warm water, place ten seeds in a row, fold the towel over, and slip it inside an unsealed plastic bag. Keep the bag in a warm spot around 80 degrees Fahrenheit for two to three weeks to see how many sprout and produce healthy root tips. If eight out of ten sprout, your batch has an 80 percent viability rate.
When spring arrives and you are ready to sow your saved collection under grow lights, follow our detailed guide on how to germinate chili seeds to provide the precise bottom heat and moisture necessary for fast, uniform sprouting.
How to Store Pepper Seeds for Maximum Shelf Life
Moisture, heat, and light are the primary enemies of stored seed. To maximize shelf life, store your dried seeds under cool, dark, and dry conditions:
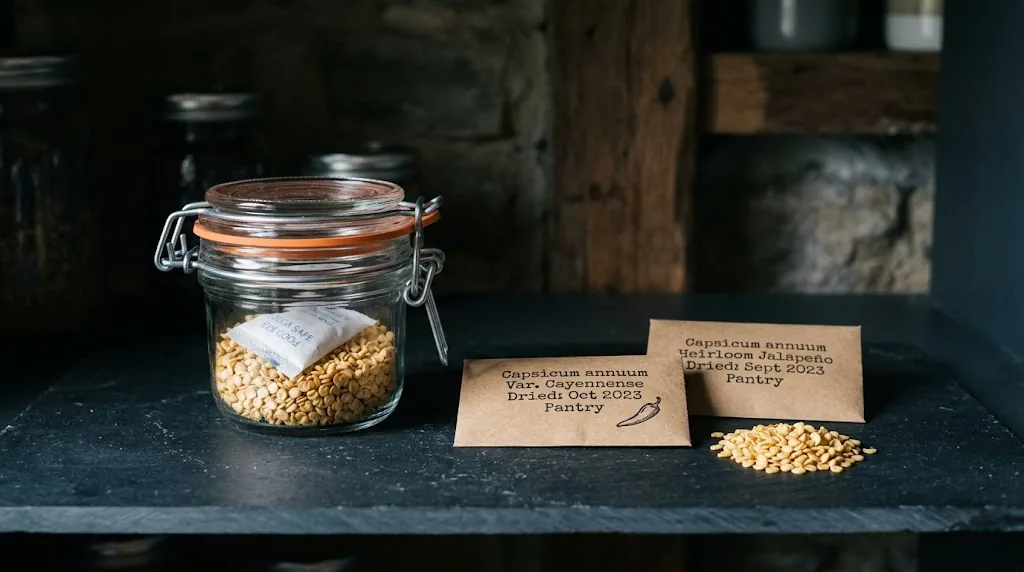
- Packaging: Place dried seeds in small paper envelopes, small jewelry baggies, or airtight glass jars. Adding a small food-safe silica gel packet inside the container absorbs residual moisture.
- Storage location: A cool, dark place such as a pantry cupboard, dark closet, or basement drawer provides stable conditions. You can also store sealed jars in the refrigerator or freezer for extended preservation.
- Clear labeling: Always record the variety name, botanical species (such as annuum or chinense), and collection year on each packet so you can track seed age accurately.
Pepper seeds often remain viable for about two years under good storage conditions, although seed performance declines with age and some lots last longer. Iowa State Extension recommends a sprouting test before relying on older seed. Cool, dry storage helps preserve viability; flower isolation, not storage, protects variety purity.
