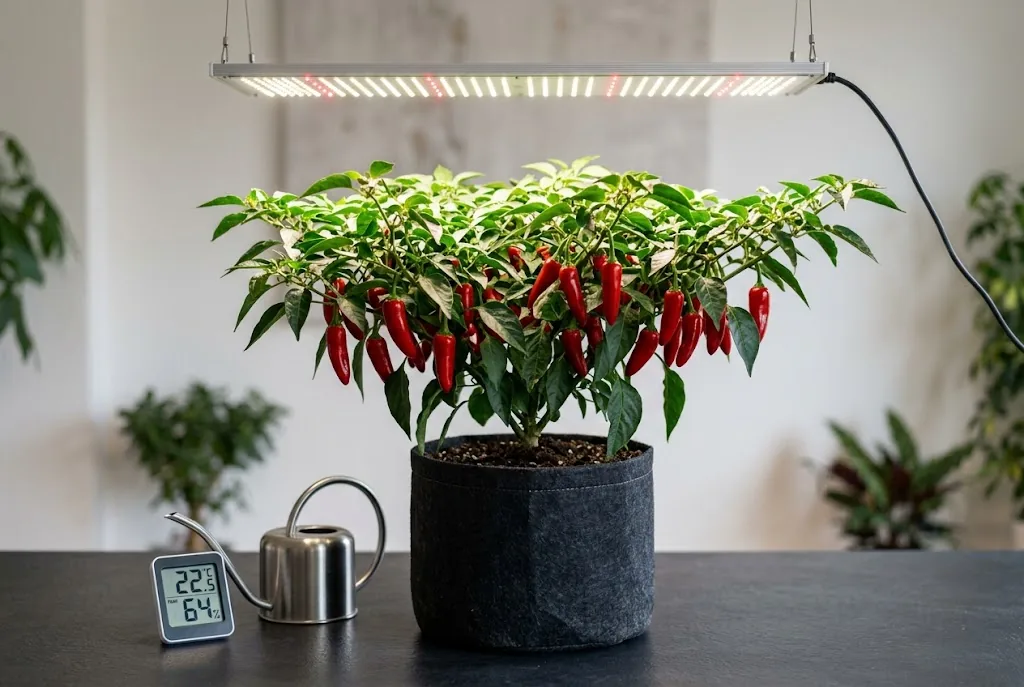
Hot peppers naturally flourish in warm climates with blazing sun, but you do not need an outdoor garden bed or summer heat to harvest a steady supply of fiery pods. If you want to grow peppers inside throughout the year, modern full-spectrum LED fixtures make it straightforward. Bringing chilis inside gives you complete control over photoperiod, temperature, and feeding, letting you pick fresh pods even in the depths of winter.
The secret to successful indoor cultivation is meeting the plant’s high energy demands. In an outdoor garden, peppers bask in direct sunlight for eight to ten hours every day. Replicating that energy inside requires quality artificial illumination, consistent warmth, proper container drainage, and manual assistance once flowers arrive. When you understand how to grow chili peppers in controlled conditions, indoor potted chilies become reliable, long-lived companions that crop season after season.
Choosing the best grow light for indoor chili crops
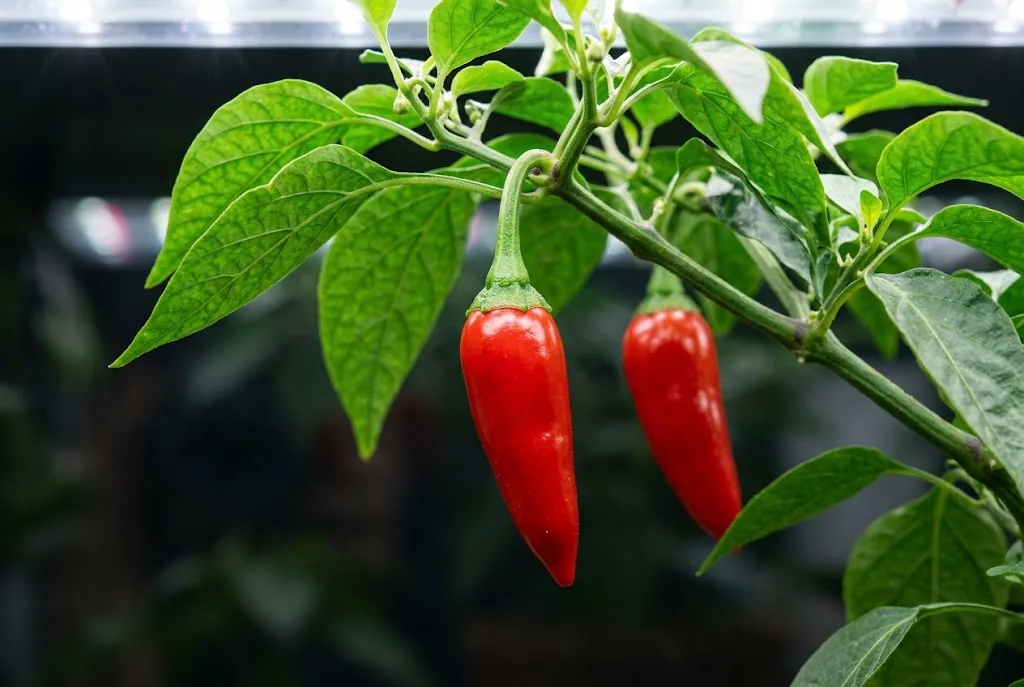
A bright windowsill rarely provides enough light to carry a chili pepper from germination to harvest. While a south-facing windowsill may keep an established houseplant alive or help young starts sprout, fruiting crops demand far higher light intensity. Without intense illumination, chile plants develop weak, leggy stems, shed their flower buds, and fail to produce pods. To grow indoors with dense foliage and heavy yields, a dedicated grow light is essential.
Modern full-spectrum LED panels are the gold standard for indoor growing. Unlike older high-pressure sodium (HPS) fixtures that consume massive amounts of electricity and throw off intense heat, LEDs run cool and deliver the balanced spectrum plants need. Quality white LEDs combine blue wavelengths (around 450 nanometers) to keep vegetative growth compact with deep red wavelengths (around 660 nanometers) to trigger heavy flowering and pod set.
When selecting lighting equipment, pay attention to Photosynthetic Photon Flux Density (PPFD), which measures the usable light reaching the plant canopy each second. For healthy indoor pepper production, aim for these canopy targets:
- Seedlings and early sprouts: 150 to 200 µmol/m²/s.
- Vegetative growth: 250 to 350 µmol/m²/s.
- Flowering and fruiting: 400 to 600 µmol/m²/s.
Hang your LED panel roughly 12 to 18 inches above the top foliage. As new growth develops, raise the fixture periodically to maintain this distance. Hanging the fixture too close risks scorching tender leaves, while placing it too high causes stretching. Connect your lighting system to a simple plug-in timer set for 14 to 16 hours of light daily. Set the timer to switch off for the rest of each 24-hour cycle; continuous light is unnecessary.
Managing temperature, humidity, and air circulation
Peppers originate in tropical and subtropical regions of the Americas, so they demand consistent warmth to thrive. Maintain daytime temperatures between 70°F and 80°F (21°C to 27°C). Nighttime temperatures can drop slightly to 65°F (18°C), which mimics natural diurnal temperature shifts and encourages sturdy stem development. If room temperatures drop below 60°F (15°C), plant metabolism slows drastically, and blossoms frequently abort before setting pods.
Keep the air moderately humid and moving gently. Dry heated rooms can stress plants, while persistently damp, stagnant air encourages fungal problems. Use a hygrometer to spot extremes, then adjust ventilation or room humidity gradually.
Constant, gentle airflow makes a dramatic difference in indoor plant care. Set up a small oscillating fan on a low setting near your setup. Gentle air movement provides three distinct benefits:
- It strengthens main stems and branches through mechanical stress, creating sturdy stalks capable of bearing heavy pod loads.
- It prevents pockets of stale, humid air from lingering under dense foliage.
- It gently shakes flowering branches, which assists with natural pollen release.
Containers, potting mix, and aeration requirements
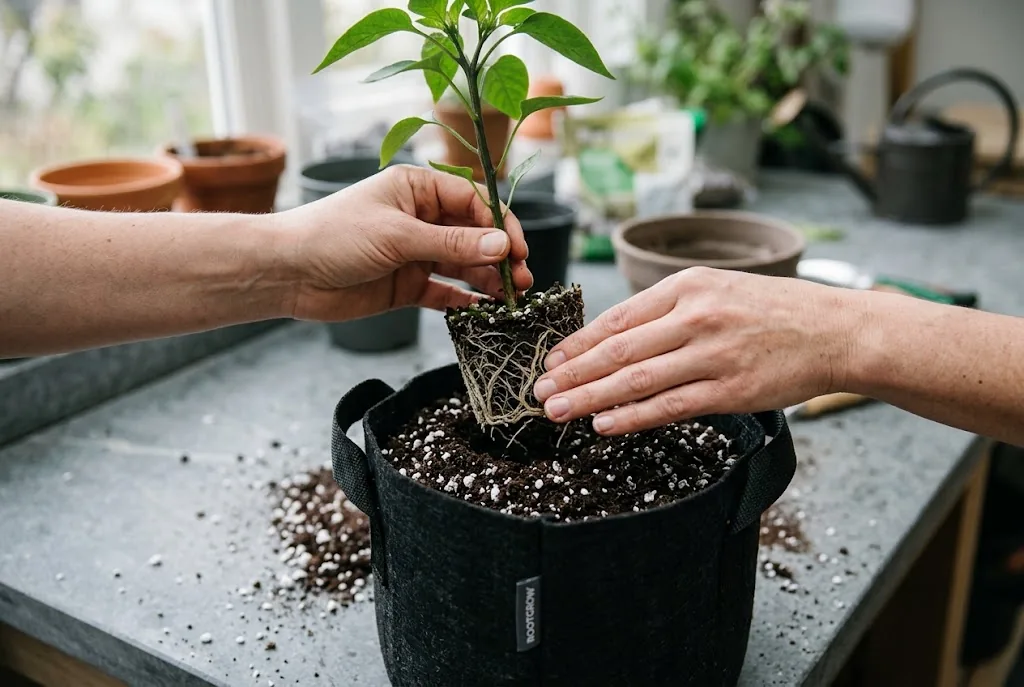
Providing an adequate root zone prevents plants from becoming root-bound prematurely. For small indoor spaces, choosing compact cultivars such as dwarf habaneros, pequins, or miniature ornamental peppers allows you to use two-gallon containers. If you are growing larger standard cultivars like jalapeños or serranos, select a three-gallon to five-gallon pot so the root system has sufficient volume to support heavy crops. You can explore the best chili varieties for pots to match your available shelf height and light footprint with cultivars naturally bred for compact spaces.
Fabric aeration pots and plastic nursery containers both work well indoors. Fabric pots excel at air-pruning roots, preventing root circling and promoting a fibrous, strong root system. However, fabric pots dry out faster than plastic pots and require sturdy saucers underneath to capture runoff.
Never scoop dirt from an outdoor garden bed into an indoor pot. Outdoor soil compacts quickly inside containers, drains poorly, and brings garden pests indoors. Instead, use a lightweight, well-aerated soilless potting mix composed of:
- 60% peat moss or coconut coir for moisture retention.
- 25% perlite or pumice for aeration and fast percolation.
- 15% screened worm castings or aged compost for organic biology and micro-nutrients.
Every container must have unobstructed holes at the base. Standing water suffocates roots, leading to root rot and premature plant death. Always discard excess water that collects in saucers thirty minutes after watering.
Starting pepper seeds indoors and early seedling care
If you choose to start seeds indoors rather than purchasing nursery starts, begin the seed starting process in shallow cell trays or small pots. Chili seeds need warmth above all else to germinate quickly. Place your plug tray on a waterproof heat mat calibrated between 80°F and 85°F (27°C and 29°C). At these warm temperatures, fresh seeds typically emerge in 7 to 14 days, whereas cold soil can delay germination for four weeks or cause seeds to rot.
Moisten your seed-starting mix with room-temperature water before sowing. Plant seeds roughly one-quarter inch deep, mist the surface, and cover the tray with a clear humidity dome to conserve moisture. Check the cells daily. The moment you spot the first green loop emerging from the mix, remove the humidity dome immediately to maintain airflow and position your grow light directly above the young growth.
When young starts produce their second set of true leaves and develop a visible root system, pot them up into larger pots. Handle young plants gently by their root balls or seed leaves rather than their delicate main stems. Water thoroughly after transplanting to settle the mix around the roots.
Watering routines and indoor fertilizer schedules
Indoor potted plants consume water at a different rate than crops in an outdoor garden bed or sunny greenhouse. Because indoor air lacks direct solar radiation and wind, soil retains moisture longer. As a rule, water only when the top inch or two of potting mix feels completely dry. Push your finger into the soil or lift the pot to gauge its weight. A pot ready for water feels light, while a moist pot feels heavy.
When you water, saturate the soil thoroughly until liquid runs freely from the bottom holes. This flushing action ensures moisture reaches the lower roots and prevents mineral salts from building up in the substrate. Avoid using ice-cold tap water directly from the pipe, as sudden temperature drops can shock warm roots. Let tap water sit at room temperature for several hours before applying it to your plants.
Peppers are moderate feeders with distinct nutritional needs across their lifecycle:
- Vegetative stage: While plants are building branches and foliage, feed every ten to fourteen days with a balanced liquid organic fertilizer (such as a 5-5-5 formula or a diluted fish emulsion and liquid kelp blend).
- Flowering and fruiting stage: Continue feeding according to the label for a complete plant food suited to container vegetables. Avoid excess nitrogen, which can favor leaves over peppers. Add phosphorus only if a growing-medium test or clear deficiency points to a need for it.
- Calcium and magnesium: Check the plant food label before adding separate supplements. If blossom end rot appears, check watering consistency first; uneven moisture can limit calcium delivery to developing pods even when the potting mix contains enough.
How to hand-pollinate chili blossoms to set fruit
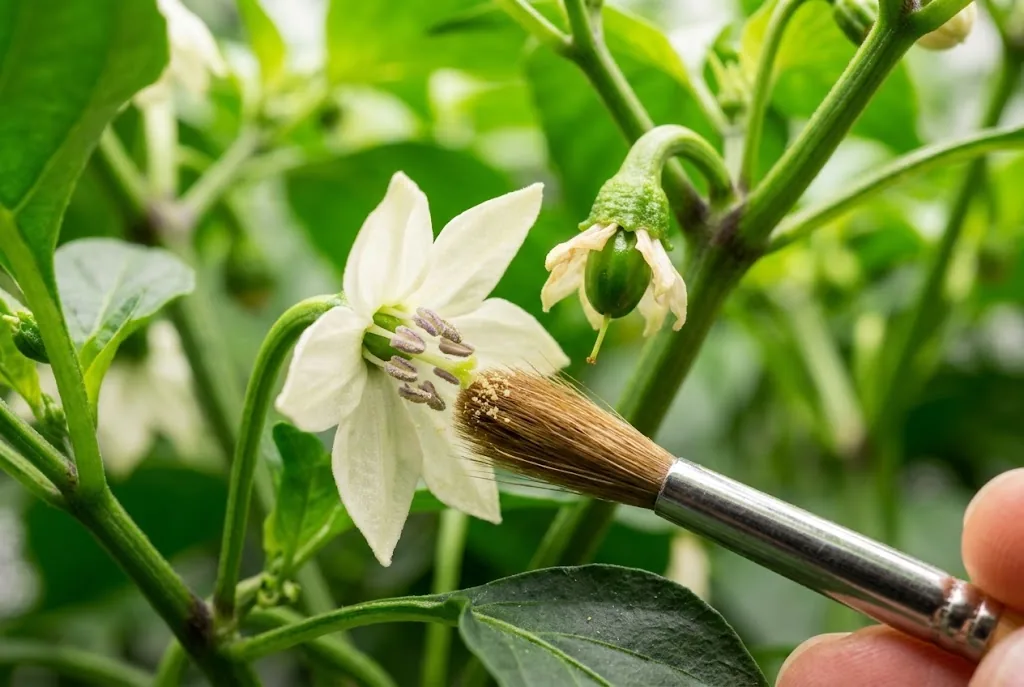
One of the most frequent disappointments beginners face when growing chile peppers under lights is watching dozens of flowers bloom and then drop off without forming a single pepper. In an open garden, natural wind currents and pollinators like bees agitate the blossoms, dislodging pollen grains. Pepper flowers can fertilize themselves without insects. If fruit set is poor indoors, gentle movement of flowering branches may help release pollen.
Pepper blossoms are perfect, hermaphroditic flowers, meaning each individual bloom contains both male pollen-producing anthers and female pollen-receiving stigmas. Because self-pollination occurs within the same flower, moving pollen is straightforward. Assist pollination around midday when lights have been on for several hours and the pollen is dry and powdery.
If flowers open but pods do not form, try one of these gentle methods:
- The gentle stem shake: Simply grasp the main stem or flower cluster and vibrate it briskly with your fingertips for two to three seconds. This can help pollen move within the flower.
- The soft artist paintbrush: Take a small, dry watercolor brush or cotton swab and twirl the bristles gently inside each open blossom. As you move from flower to flower, you will see a dusting of yellow pollen collect on the brush tips.
- The electric toothbrush technique: Hold the back of a vibrating electric toothbrush head against the branch directly behind a cluster of open flowers for a few seconds. The vibration can help release pollen.
After pollen transfer, the petals may wither and a small pod may begin to swell behind the flower.
Pruning indoor chili varieties for compact growth
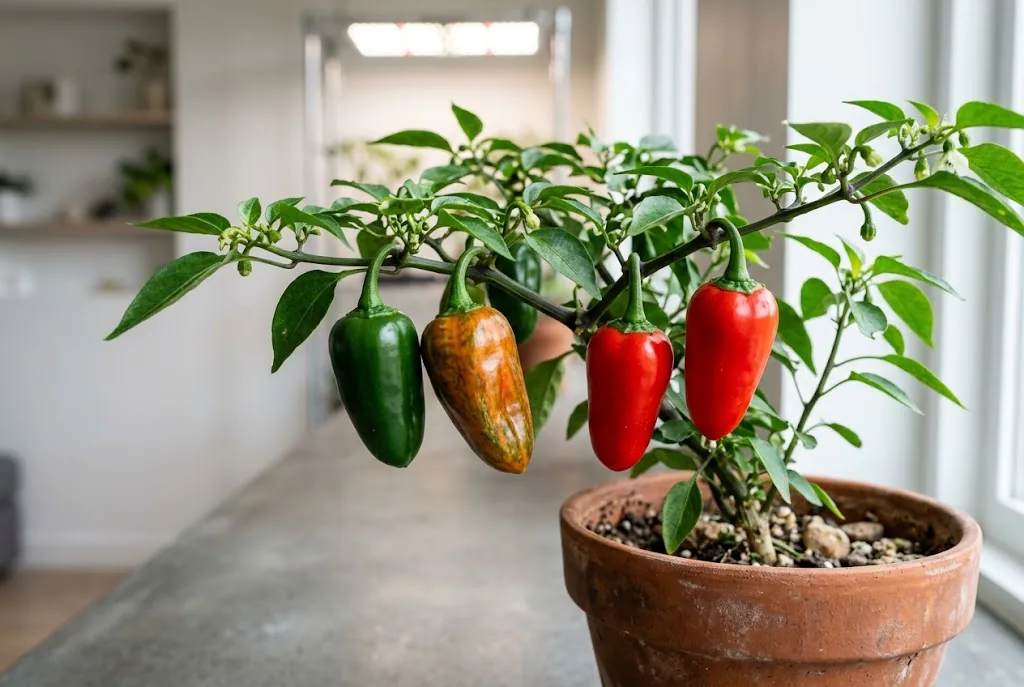
In an indoor setup where vertical clearance and horizontal spread are limited, pruning keeps bushes compact, productive, and manageable. Left unpruned, many Capsicum varieties grow into tall, sprawling plants that quickly outgrow their light footprint.
When young pepper plants reach about six inches in height and possess five to six sets of true leaves, prune off the central growing tip just above a leaf node. This topping practice removes apical dominance and encourages the plant to push vigorous side shoots from dormant nodes below. The result is a stocky, umbrella-shaped canopy that intercepts light evenly across all branches.
Throughout the growing season, perform light maintenance pruning:
- Trim away any weak, spindly inner branches that receive little direct light.
- Strip off yellowing leaves near the bottom of the stalk to improve airflow around the pot rim.
- Pinch off early flower buds that appear before the plant has established sufficient vegetative framework to support heavy pod loads.
Because peppers are perennial shrubs rather than annuals, healthy specimens can produce indoors for three to five years or longer. When a heavy harvest flush wraps up in late autumn, you can cut the foliage back and maintain the plant through winter before fresh spring growth resumes. Gardeners interested in multi-year container care can learn more about overwintering chili plants to preserve their prized genetics and enjoy earlier harvests next season.
Troubleshooting common indoor pepper problems
Even with attentive plant care, indoor growing presents unique challenges. Catching symptoms early keeps small issues from ruining your harvest.
- Blossom drop: If flowers drop without setting pods, verify your temperature and pollination routine. Heat around 90°F (32°C), cold conditions, and water stress can reduce fruit set. Low humidity and excessive nitrogen fertilizer are also primary causes of aborted blooms.
- Pale, yellowing leaves: Yellow leaves on lower growth usually indicate either overwatering or a nitrogen deficiency. Allow the soil to dry between waterings and check that drain holes are clear. If new growth looks pale yellow with green veins, the plant likely needs iron or magnesium.
- Edema and leaf curl: Raised, blister-like bumps on the undersides of leaves occur when roots absorb water faster than the foliage can transpire it. Edema is caused by high humidity, wet soil, and lack of airflow. Increase fan speed and reduce watering frequency.
- Indoor pests: Aphids, fungus gnats, and spider mites thrive in warm indoor environments. Inspect the undersides of leaves weekly. Treat aphid infestations with insecticidal soap or pure cold-pressed neem oil sprays applied when grow lights are off to avoid leaf burn. For fungus gnats, allow the top layer of potting mix to dry thoroughly between waterings and use yellow sticky cards to trap adult flies.
Frequently asked questions about growing chili peppers indoors
How many hours of light do chili plants need indoors?
Chilies need 14 to 16 hours of daily light under full-spectrum grow lights to grow vigorously and ripen pods. Provide 8 to 10 hours of uninterrupted darkness each night so plants can rest and complete natural metabolic cycles.
Can chili peppers bear fruit indoors all year?
Yes. Because chilies are perennial plants that do not require seasonal day-length triggers to initiate flowering, maintaining consistent warmth, proper nutrition, and 14 to 16 hours of artificial light allows them to blossom and produce peppers year-round.
What is the best indoor temperature for a fruiting pepper plant?
The ideal temperature for flowering and pod set is 70°F to 80°F (21°C to 27°C) during the day and 65°F to 68°F (18°C to 20°C) at night. Sustained heat around 90°F (32°C), cold conditions, or water stress can cause flowers to drop.
Do indoor chili peppers need pollinators to produce peppers?
No. Pepper flowers are largely self-fertile and can set fruit without insects. If flowers repeatedly drop without setting pods, first check temperature and watering. A gentle shake of flowering branches can also help move pollen.
