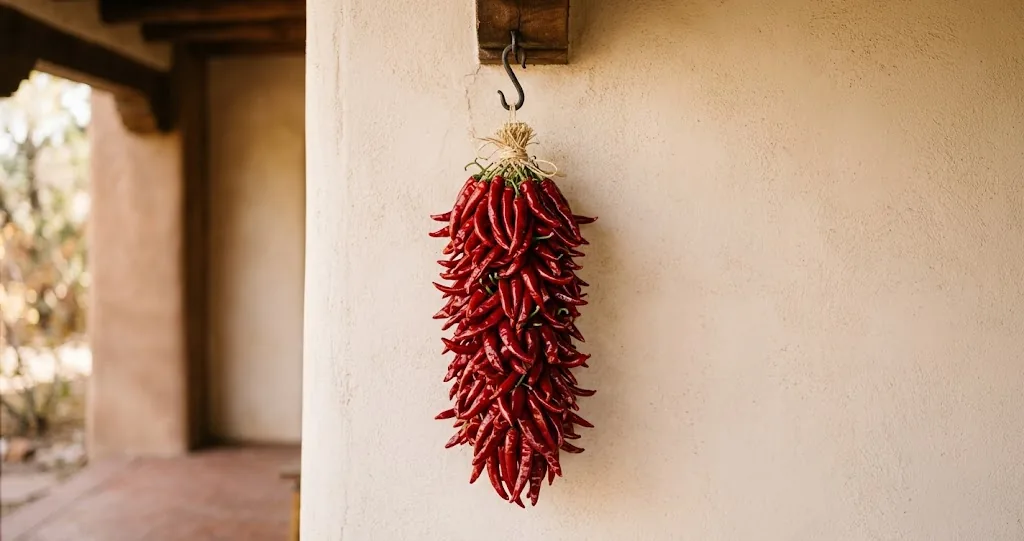
The easiest way to dry peppers depends on the harvest and the weather. Drying chili peppers turns a sudden summer surplus into a year-round pantry staple. Once a pod is bone-dry, its flavor changes as moisture leaves, and the dried pods can be stored in a sealed jar for later use. The actual work takes only a few minutes of attention up front, then time and gentle heat do the rest.
Three methods cover almost every home situation: air drying on a screen or thread for warm, dry climates; oven drying on the lowest setting for small batches or humid homes; and food dehydrator drying for the most predictable results with the least supervision. This guide walks through each one with realistic temperatures, times, and doneness checks, plus food-safety notes on mold and moisture. For the broader picture of how dried pods fit into a chili pepper harvest, see our guide to how to store chili after harvest.
Which drying method fits your situation?
The method you choose depends mostly on climate, batch size, and equipment. A quick comparison:
- Air drying on a screen or thread. Cheapest, slowest, and the most weather-dependent. Works in dry, warm climates for thin-walled peppers like cayenne, Thai, and Pequin. Drying time varies with pod size, airflow, and humidity.
- Oven drying. Fastest on hand and works in any climate, but uses the kitchen as a workroom for several hours and is easy to mess up if the oven runs hot. Best for small batches and thicker-fleshed pods.
- Food dehydrator drying. The most predictable option for medium to large harvests, with a built-in fan and low, steady heat. Set it, forget it for a few hours, and the pods come out evenly dry. Costs a bit upfront, pays back in saved frustration.
Most home growers end up using two methods in the same season: a machine for thick-walled pods like jalapeno, poblano, and habanero, and thread drying for thin-walled cayenne and Thai peppers that finish before the weather turns.
Preparing fresh peppers for drying
Whatever method you pick, start with the same prep. Sort through your harvest and discard any pods that feel soft, have dark or fuzzy spots, or smell off. One moldy pod can spoil a whole batch in a closed jar. Wash the keepers under cool running water and pat them dry with a clean towel, or let them air-dry on the towel for an hour or two.
Then decide whether to dry whole or sliced:
- Dry whole for thin-walled small peppers: cayenne, Thai bird’s eye, Tabasco, Pequin. Whole pods look better on a ristra, and the seeds stay inside where they belong.
- Halve or quarter lengthwise for thick-walled peppers: jalapeno, poblano, Anaheim, habanero. Cutting exposes the flesh so moisture can escape, which is what makes the difference between drying before spoilage can set in.
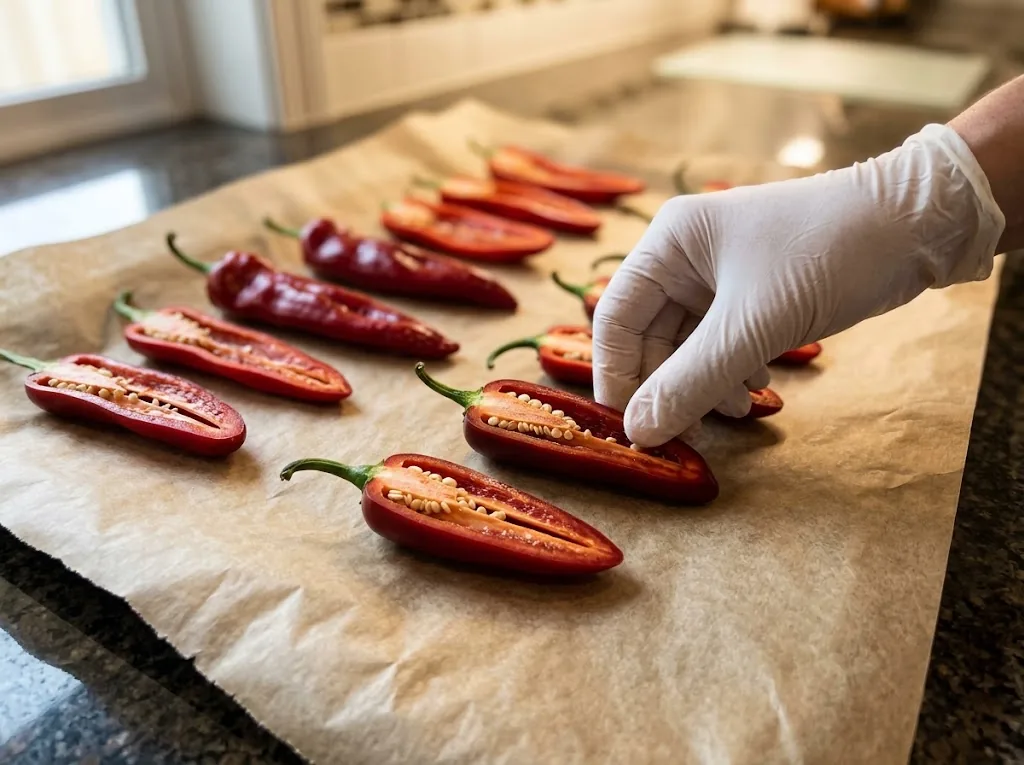
For halved peppers, scrape out the seeds and inner white membrane if you want a milder result, or leave them in for full heat. The seeds do not add much capsaicin, but the placenta (the white pith) holds most of it. Gloves are worth wearing any time you are cutting hot peppers, especially with habaneros and superhots. Use clean food-safe gloves and wash your hands after handling peppers.
Air drying on a screen or string
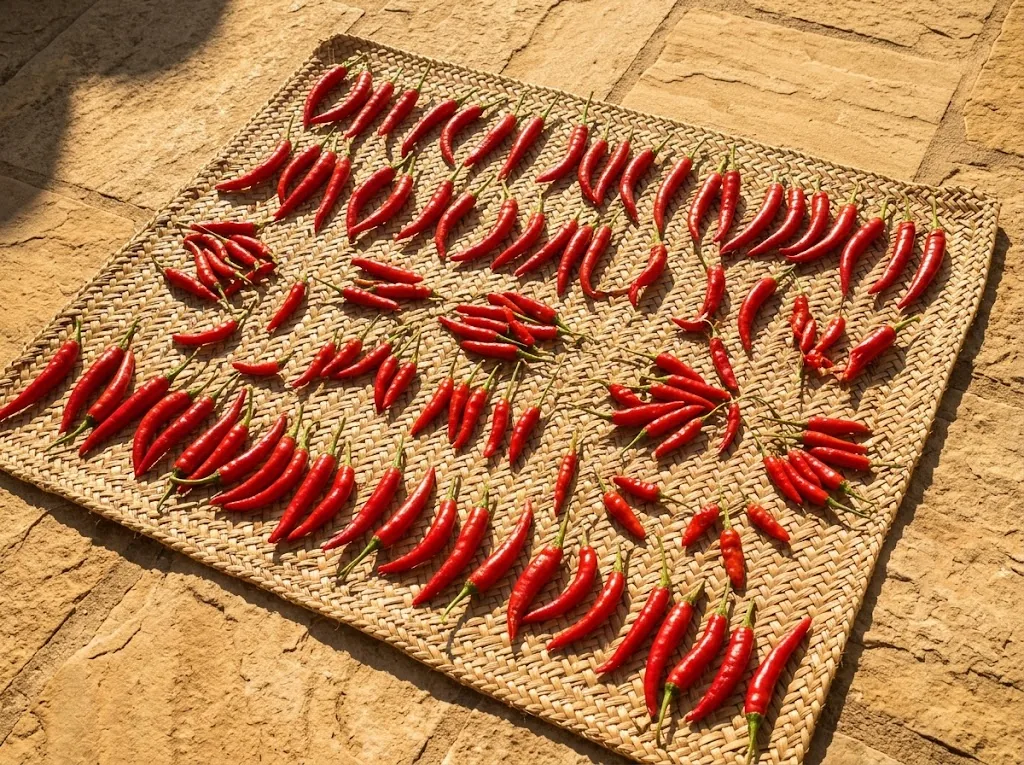
Air drying is the oldest method and the cheapest, but it needs dry air and patience. Humid air slows drying and raises the risk of mold, so use a dehydrator when you cannot keep the drying space warm and well ventilated. Indoors, a warm spare room, attic, or garage works as long as there is good airflow.
Drying on a screen
Lay whole or halved peppers in a single layer on a window screen, cooling rack, or piece of hardware cloth set on blocks so air can move underneath. Place them somewhere warm, dry, out of direct strong sunlight (intense sun fades color and cooks the surface). Rotate the peppers every day or two and remove any that show signs of softness or spoilage. Check the pods daily. Thin-walled chile varieties usually dry faster, but the time varies with pod thickness, temperature, humidity, and airflow.
Hanging pods on a string ristra
For thin-walled peppers with the stems still attached, thread a needle with strong kitchen twine or embroidery floss and pass it through the stems, leaving a finger-width of space between each pod. Tie a small stick or wooden bead at the bottom so the peppers do not slide off. Hang the twine in a warm, dry, well-ventilated spot. The traditional Mexican ristra hangs outside under an eave; indoors, a pantry doorway or covered porch works the same way. Air circulation around each pod matters more than sunlight, and rotating the line once a day evens out the drying.
Pods are ready for storage when they feel dry and tough to brittle, with no soft or moist flesh inside. Check a thick piece by cutting it open after it has cooled. If the center still feels damp, keep drying.
Oven drying, step by step
Oven drying works in any kitchen and is the right choice for small batches or when the weather is too humid for air drying. The trade-off is that your oven runs at low heat for hours and the kitchen warms up with it. Ventilation helps; a fan or open window keeps the capsaicin fumes from stinging your eyes.
- Preheat the oven to its lowest setting, at about 140 to 150 degrees F (60 to 66 degrees C), checking the temperature near the peppers with an oven thermometer. If your oven cannot hold a low drying temperature, use a dehydrator instead. Keep the oven door slightly open only when your oven manual permits it. Where the oven manual permits it, opening the door slightly improves airflow and lets moisture escape.
- Lay peppers cut-side up on a parchment-lined baking sheet or on a wire rack set inside the sheet. Keep them spread out with space between each piece.
- Place the sheet in the oven. Every hour, rotate the sheet front-to-back and flip the peppers over so both sides dry evenly. Larger, thicker-skinned peppers take longer to dry than smaller or thin-skinned chiles.
- Oven drying may take several hours. Check regularly rather than relying on a fixed time. Once cooled, the pieces should be dry and tough to brittle, with no damp center.
The biggest mistake is running the oven too hot. Excessive heat can brown the surface before the inside loses enough moisture. If a pod turns brown on the side touching the pan, the oven is too hot or the door needs to open wider. Pull those peppers and use them soon.
For thicker pods like poblano and Anaheim, halve them lengthwise before drying and remove the seeds and stem. That is what lets the flesh dry in a reasonable time rather than rotting around a moist core. Smaller thin-walled peppers can be dried whole on a string, then finished in the oven if you want them ready the same day.
Using a food dehydrator
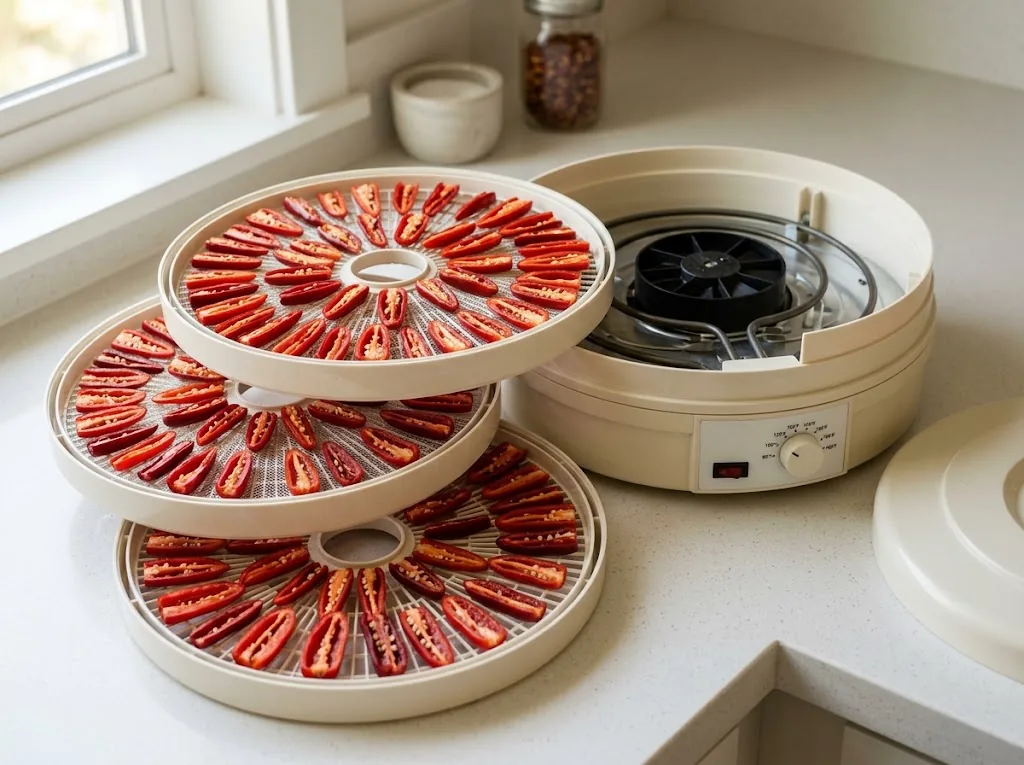
A dehydrator is the most hands-off method and gives the most even results, especially for thicker-fleshed pods. The built-in fan circulates warm air around every tray, so you do not need to rotate the peppers. Drying time is usually 8 to 12 hours, sometimes up to 18 for the thickest pods, and the temperature stays steady the whole time. It is also the easiest method for gardeners who want to process a full basket at once, since the trays stack and the fan does the work of moving air over each layer.
- Arrange the peppers cut-side up on the trays without overlapping. Leave space between pieces for airflow.
- Follow your dehydrator’s vegetable setting. Penn State Extension recommends starting peppers at 140 F (60 C) for two hours, then reducing to 130 F (54 C) until dry.
- Let them run for 8 to 12 hours. Check at 8 hours: smaller, thinner pieces may already be done. Larger pieces need more time, often another 2 to 6 hours.
- Check cooled pieces for a dry, tough to brittle texture and no moisture inside.
If the unit has a fan in the lid rather than the back, rotate the trays top to bottom every few hours to even out the drying. Most modern machines with a rear-mounted fan do not need this. Discard seeds that collect at the bottom, or use clean seeds as a spice.
How to tell when the pods are fully dry
Under-dried peppers will mold in storage. Over-drying wastes time but does not ruin the result. Cool a sample, then check both the surface and the center:
- Tough to brittle, with no soft spots: the right endpoint for storage. The cooled piece feels dry throughout.
- Brittle and dry inside: ready for storage or grinding into flakes or powder.
- Pliable, cool, or soft in the middle: not done. Return to the oven or machine and check again later.
For storage, the peppers should feel almost weightless and there should be no dampness or stickiness on the skin. If you cut a pod open, the flesh inside should look and feel dry, with seeds loose and rattling.
Storing dried chili peppers
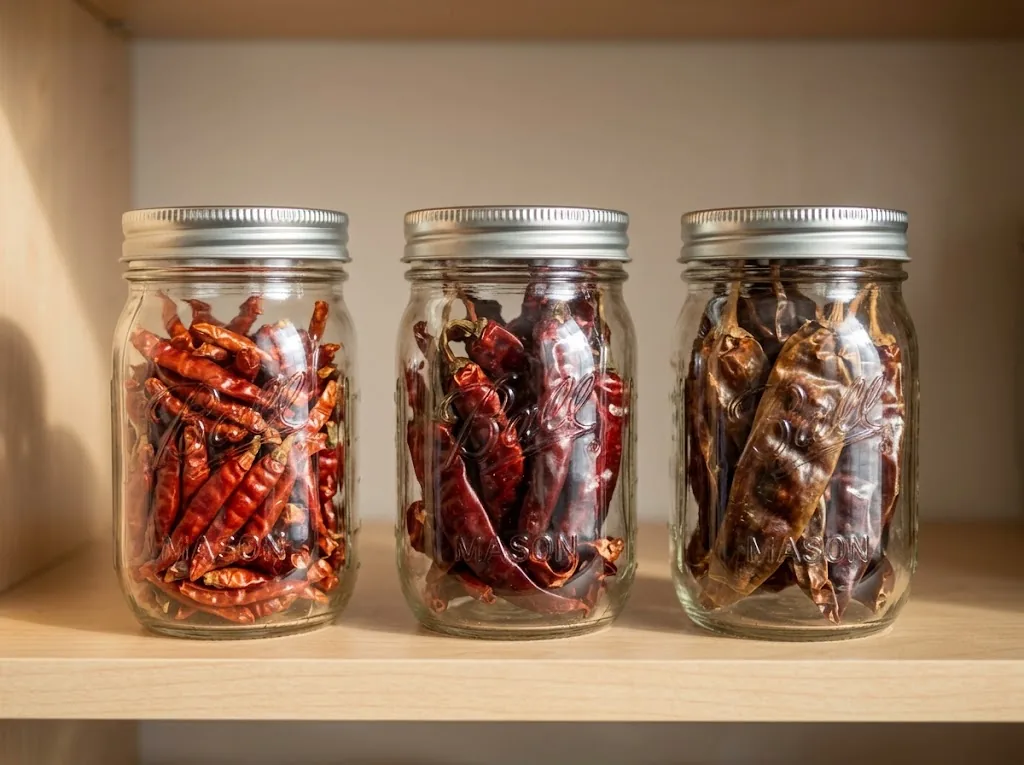
Once the peppers are fully dry, store them whole in an airtight container away from light and heat. A glass mason jar with a tight lid, kept in a pantry or cupboard, works well. For best quality, plan to use dried peppers within 4 to 12 months, the range given by University of Minnesota Extension; heat, light, and moisture shorten that window. Once you grind them into powder or flakes, the surface area increases and the flavor fades faster, so grind in small batches and store whole pods as your long-term supply.
If you live in a humid climate, tuck a food-safe desiccant packet in the jar to absorb any stray moisture. For a fuller walkthrough of jar choice, humidity, and color retention, see our guide to how to store dried chili peppers.
Common problems and food-safety notes
A few things go wrong often enough to call out:
- Mold on drying pods. Often caused by humid drying conditions or storing pods before they are fully dry. Discard any pod with fuzzy growth, dark wet spots, or an off smell. Do not try to save it by drying further.
- Skin bleaching or browning. Strong direct sunlight fades the red and orange pigments. Indoors or under a shade, the color stays vibrant.
- Capsaicin fumes. Drying hot peppers, especially in an oven or food dehydrator, releases capsaicin into the air. Run the machine in a separate room with the door closed and a window open if you can. Keep the kitchen ventilated for oven drying.
- Skin and eye contact. Wear gloves when handling fresh hot peppers, especially superhots, and wash your hands and any utensils thoroughly before touching your face.
For recipes that turn dried pods into seasoning, our guide to how to make chili flakes and chili powder at home covers grinding, storage, and blending ideas.
Frequently asked questions
Can you dry them whole?
Yes, especially thin-walled small peppers like cayenne, Thai, and Pequin. Whole pods dry well on a ristra or a screen, and they look better in storage. Thicker-fleshed peppers like poblano and Anaheim are much slower to dry whole and are likely to rot before they finish; halve or quarter them first.
How long does the process take?
It depends on the method and the pepper. Drying time depends on pod thickness, temperature, humidity, airflow, and method. Check thin peppers frequently and allow thicker pieces more time. Store only when the cooled pieces are tough to brittle and dry throughout.
What temperature works best?
For an oven, aim for about 140 to 150 F (60 to 66 C) and verify with an oven thermometer. For a dehydrator, follow the machine’s vegetable setting; Penn State Extension recommends 140 F (60 C) for two hours, then 130 F (54 C) until dry.
How long will dried pods keep?
Stored whole in an airtight jar in a cool, dark pantry, dried chilis are best used within 4 to 12 months, depending on storage conditions. Once ground into powder or flakes, flavor fades faster, so grind in small batches as you need them.
Can I use an air fryer?
Air fryers run hotter than dehydrators, usually 150 to 200 F on the dehydrate setting if they have one. Small thin peppers can finish in an hour or two at low temperature, but watch them closely. Follow the appliance manual and spread peppers in a single layer; short cycles and hot spots can dry pieces unevenly.
Should I remove the seeds before drying?
For halved thick peppers, scraping out the seeds speeds drying and lets you control the heat level. For whole thin peppers dried on a thread, leave the seeds inside. They fall out naturally as the pod dries and shrivels.
