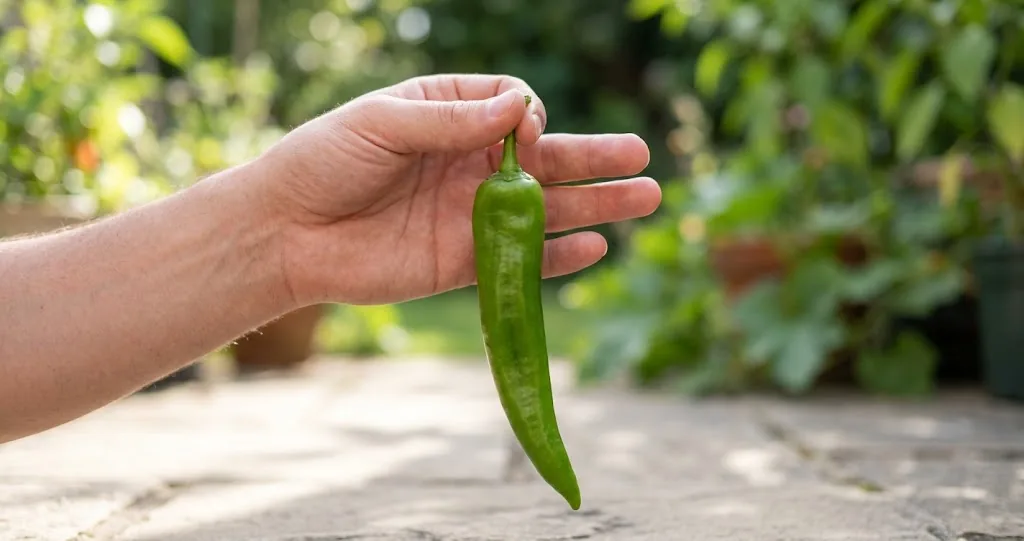
Anaheim peppers are long, mild green chiles in Capsicum annuum, the same species as bell peppers and jalapeños. They are a familiar choice for roasting, stuffing, and everyday Southwestern cooking.
This guide covers Anaheim peppers from field to fork: where the Anaheim variety actually came from, how hot Anaheim peppers really are, how to grow Anaheim peppers, when to pick them, how to roast Anaheim peppers without tearing the skin, and how to use Anaheim peppers across a week of cooking. Anaheim peppers earn their spot because they are forgiving in the kitchen and prolific in the garden. For a broader tour of how this Anaheim pod sits inside the chili family, the types of chili peppers cluster guide is a useful next stop.
Where Anaheim peppers came from
Anaheim is a cultivar within the New Mexican pod type, rather than a catchall name for every long green chile. New Mexico State University reports that Anaheim seed originated in New Mexico and was taken to Anaheim, California, where it became widely cultivated. The same report identifies New Mexico No. 9, released in 1913, as the cultivar that established the New Mexican pod type and as the genetic base for New Mexican-type chiles, including Anaheim.
“Hatch chile” is a geographic label for chile grown in New Mexico’s Hatch Valley, not a separate botanical species. Cultivar, weather, growing conditions, and fruit age can all affect heat, so it is more useful to compare a particular pepper or seed selection than to assume every Anaheim or Hatch chile will taste alike. New Mexico State University’s cultivar history explains the New Mexican pod type, its 1913 release, and the factors that affect chile heat.
Botany and what Anaheim peppers actually look like
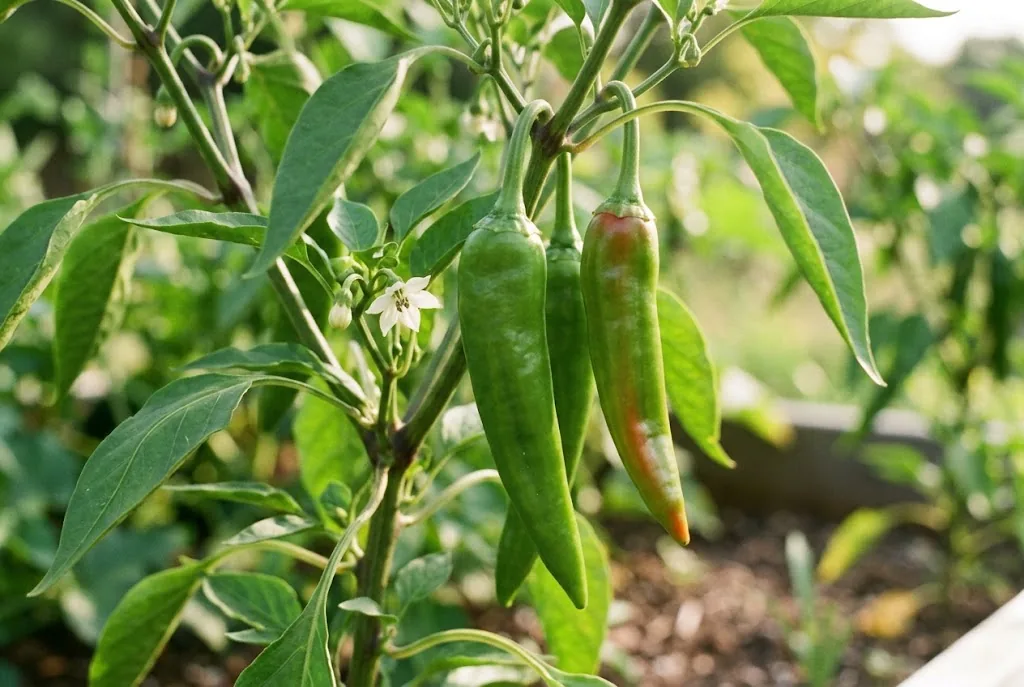
Anaheim peppers belong to Capsicum annuum, the most widely grown chile species in the world. Anaheim pepper plants are upright, bushy, and usually 60 to 90 cm (24 to 36 inches) tall at maturity. They branch freely and set fruit continuously once they begin, with ripe Anaheim pods hanging downward from the upper nodes. Leaves are medium green, lance shaped and smooth edged.
The Anaheim pod itself is long, tapered, and slightly curved, between 15 and 25 cm long and 4 to 5 cm wide at the shoulder. Unripe Anaheim peppers are pale to medium green with a smooth, thin walled skin and a pointed tip. Fully ripe Anaheim peppers turn bright red, especially in long warm seasons, and the red Anaheim pods are sweeter and a touch warmer than the green. Anaheim peppers generally have a thinner wall than the broader, heart-shaped pepper, which helps their skin blister and peel after roasting, while their long shape makes them useful for stuffing.
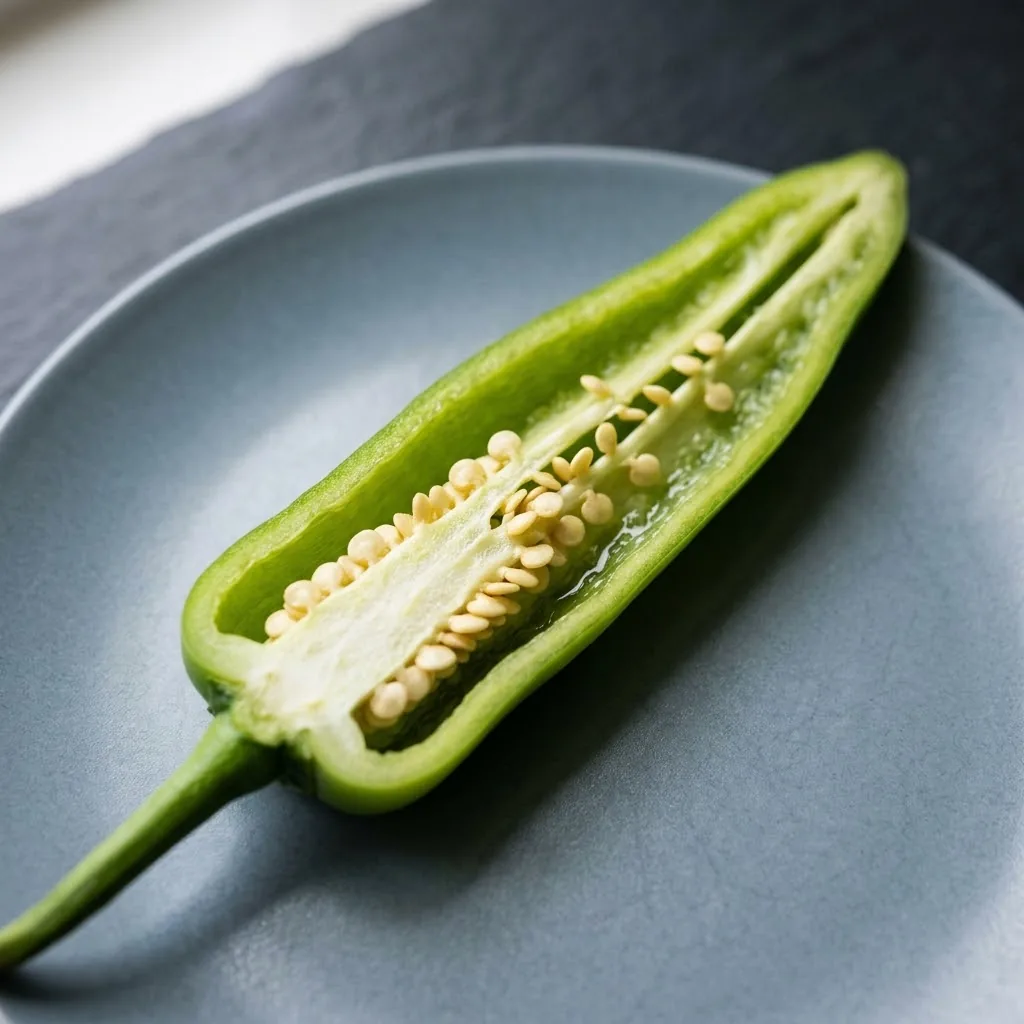
Anaheims are easy to tell apart when planted side by side. If you grow Anaheim peppers next to other annuum types, the difference is obvious. The broader, heart-shaped pepper is usually darker green and matures to a deep reddish brown. Jalapenos are short, stubby, and thicker walled. Banana peppers are yellow, slender, and usually picked small. Bell peppers are blocky and lobed. Anaheim peppers are the long green wedge among them, with thinner walls and a curl at the tip.
How hot Anaheim peppers really are
Anaheim peppers are commonly listed at 500 to 2,500 Scoville Heat Units (SHU), which places them below a typical jalapeño range of 2,500 to 8,000 SHU. Heat is not fixed: genetics, weather, growing conditions, and fruit age all affect capsaicinoids. The placenta carries most of the capsaicinoids; seeds are not the source, although they can pick up capsaicinoids from nearby tissue. University of California Agriculture and Natural Resources lists Anaheim at 500 to 2,500 SHU, and NMSU explains why heat varies.
For most home cooks this Anaheim range is friendly. A whole Anaheim pepper sliced into a slaw adds warmth without burn. A roasted Anaheim pepper folded into a cheese stuffed chile relleno is gentle enough that children will eat it. The same Anaheim pod minced into a salsa brings a clean low hum that lets the other ingredients lead. Anaheim peppers are perfect when you want flavor and a touch of warmth without crossing into spicy food. You can always add heat later; you cannot subtract it.
How to grow Anaheim peppers from seed to harvest
Anaheim peppers need warm soil, full sun, even moisture, and a long growing season. Local frost dates and the cultivar’s seed packet should set your timing; NMSU’s home-garden chile guide provides region-specific growing guidance.
Starting Anaheim pepper seeds indoors
Sow Anaheim pepper seeds eight weeks before your average last frost. Press them a quarter inch deep into a sterile seed starting mix and keep the medium at 24 to 29 degrees C (75 to 85 degrees F). A heat mat speeds germination and keeps things consistent; without bottom heat, germination can be slow and uneven. Anaheim seeds usually sprout in 7 to 14 days, faster than super hots but slower than tomatoes. As soon as the cotyledons open, move Anaheim seedlings under strong light, ideally 14 to 16 hours a day from a sunny window plus a cheap LED panel, or a greenhouse bench. Pot them up into 10 cm (4 inch) pots at the first true leaf and keep them warm.
Transplanting Anaheim peppers outdoors
Harden Anaheim seedlings off for 7 to 10 days before planting out. Wait until nighttime temperatures stay above 13 degrees C (55 degrees F) and soil temperatures are at least 18 degrees C (65 degrees F). Anaheim peppers tolerate dry heat better than most peppers, but cold soil and cold nights stall growth and cause blossom drop. Space Anaheim plants 45 to 60 cm (18 to 24 inches) apart in rows 60 to 90 cm (24 to 36 inches) apart, or one Anaheim plant per 20 L (5 gallon) container. Anaheim peppers need full sun, ideally 8 or more hours of direct light, and like a south facing wall or a stone patio that radiates heat back at them in the evening.
Soil, water, and feeding
Anaheim peppers prefer a well drained, sandy loam with a pH of 6.0 to 7.0. Anaheim plants tolerate slightly alkaline soil better than most chiles, which suits the Southwest where many beds run a little sweet. Work a few inches of compost into the planting bed and add a balanced organic fertilizer at planting. Once flowers appear, switch to a feed that is lower in nitrogen and higher in phosphorus and potassium to push Anaheim fruit rather than Anaheim leaves.
Water deeply but not often. Let the top 2 to 3 cm of soil dry between waterings, then soak the root zone. Keep the soil evenly moist during fruit set. Drip irrigation is ideal because it keeps Anaheim pepper foliage dry and steady. Mulch with straw or chopped leaves to conserve moisture and keep soil temperature steady. Avoid overhead watering late in the day, which invites fungal problems in humid climates.
Companion planting and crop rotation
Anaheim peppers are happy in a traditional Southwest bed of tomatoes, basil, onions and oregano. Marigolds along the edge deter nematodes and add color. Avoid fennel and kohlrabi as neighbors, since both are known to stunt Anaheim peppers. Do not plant Anaheim peppers in the same bed where tomatoes, potatoes, eggplants or other solanums grew the previous year; a three to four year rotation helps prevent Verticillium wilt and other soil borne diseases.
Common problems and how to spot them early
Anaheim peppers are among the most trouble free chiles, but a few issues are worth knowing.
Blossom drop happens when nights stay above 29 degrees C (85 degrees F) or below 13 degrees C (55 degrees F). Flowers open, then fall without setting Anaheim fruit. The Anaheim plant usually recovers once temperatures moderate. Steady water and a light shade cloth during heat waves reduce the worst of it.
Sunscald shows up as papery, light colored patches on the shoulders of Anaheim pods that face direct afternoon sun. A healthy Anaheim leaf canopy protects the fruit, so avoid heavy pruning that exposes the pods. If a single Anaheim pod sunscalds, pick it; it will not recover.
Flea beetles pepper young Anaheim transplants with tiny round holes, giving leaves a shotgun blast look. Floating row covers until Anaheim plants are established usually solve the problem. Aphids and hornworms show up the same way they do on tomatoes; a strong spray of water knocks aphids off, and hand picking is the most reliable cure for hornworms.
Harvesting and handling Anaheim peppers
Pick Anaheim peppers when they reach 15 to 20 cm (6 to 8 inches) and are firm and a clean medium green. Anaheim pods are easy to grow and the plant keeps producing as long as you keep picking, so plan to harvest every 3 to 4 days through the main season. Use sharp scissors or bypass pruners to cut the stem about 1 cm above the cap; pulling Anaheim pods off by hand can split branches.
For a sweeter, slightly hotter Anaheim pepper, leave a portion of the crop on the plant until it ripens to red. Red Anaheim pods are delicious roasted and frozen, dried into California chiles for red enchilada sauce, or strung into ristras and hung in a warm dry place to cure. Anaheim peppers picked at full ripeness are sweeter and slightly hotter than green Anaheim pods.
Anaheim peppers are mild enough that you do not need gloves for routine kitchen prep, but if you are sensitive to chili oils or you are processing a large batch of red ripe Anaheim pods, wear food safe gloves. Wash your hands, knife and cutting board well afterward, and never touch your eyes until you have washed with soap.
Storing, roasting, and preserving Anaheim peppers
Fresh storage in the refrigerator
Fresh Anaheim peppers keep 2 to 3 weeks in the refrigerator when unwashed and stored in a loose plastic bag in the crisper drawer. Anaheim pods have thicker walls than a jalapeno, so they hold up well, but Anaheim peppers do eventually soften and wrinkle. Use the firmest Anaheim pods first.
Roasting and peeling Anaheim peppers
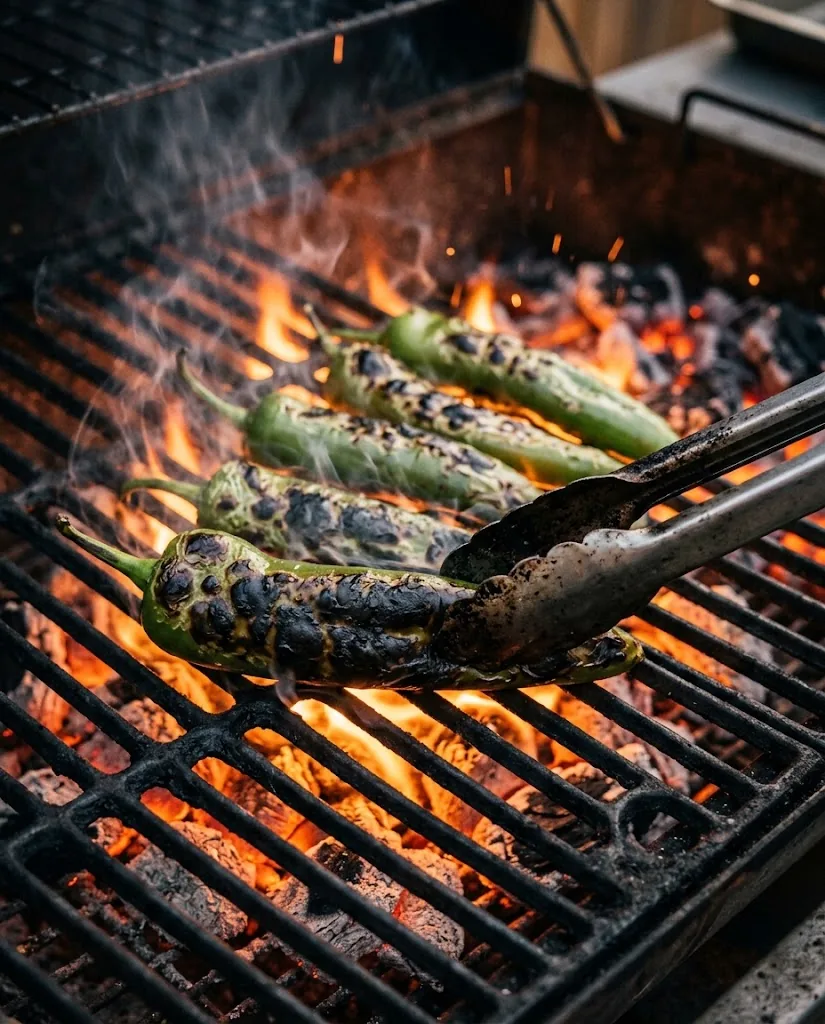
Roasting is what Anaheim peppers are made for. The thin Anaheim skin blisters and peels easily when charred, and the Anaheim flavor underneath turns sweet and smoky.
- Set a broiler to high, or light a gas burner to medium.
- Lay whole Anaheim peppers on a foil lined sheet 10 cm (4 inches) below the broiler element, or spear them on a long fork and hold them over the gas flame.
- Turn every 2 to 3 minutes until the Anaheim skin is evenly blackened and blistered on all sides.
- Transfer hot Anaheim peppers to a bowl, cover tightly with plastic wrap or seal in a paper bag, and let them steam for 10 to 15 minutes.
- Slit each Anaheim pepper, pull out the seed core, and slip the charred skin off under cool running water. Pat dry.
Do not skip the steaming step. It loosens the Anaheim skin dramatically and is the difference between a five minute job and a frustrating twenty minute one. Roasted Anaheim peppers can be used right away in any recipe, or frozen flat in heavy duty bags for up to 12 months.
Drying Anaheim peppers into California chiles
Red ripe Anaheim peppers can be dried into what the trade calls California chiles, an ingredient in classic red enchilada sauce and a decorative ristra. Drying is also how Anaheim peppers become a pantry staple that lasts all year.
- String red Anaheim pods through the stems with heavy thread and hang in a warm, dry, well ventilated room for 3 to 4 weeks until brittle.
- Alternatively, halve and seed the Anaheim pods, lay them on a dehydrator tray at 57 degrees C (135 degrees F), and dry 6 to 10 hours until leathery and brittle.
- Store fully dried Anaheim pods in airtight jars away from light; they keep their color and heat for 6 to 12 months.
Freezing Anaheim peppers for later use
Anaheim peppers freeze well either roasted or raw. Lay raw whole Anaheim pods on a parchment lined sheet, freeze until solid, then transfer to a freezer bag; they will keep a year and go straight from the freezer into the roasting pan or the soup pot. Freezing Anaheim peppers is the easiest way to keep a big harvest through the winter.
Cooking with Anaheim peppers
Anaheim peppers are the everyday Southwest chile: gentle enough for breakfast eggs, smoky enough for a serious enchilada sauce, and long enough to stuff for the classic chile relleno dish. Anaheim peppers can be eaten raw or cooked, which makes them one of the most versatile peppers in the kitchen. A short tour of the most useful Anaheim preparations.
Fire roasted Anaheim sauce
A classic New Mexican roasted-pepper sauce. Roast and peel about 1 kg (2 lb) of Anaheim peppers as above. In a saucepan, soften a chopped onion and 4 cloves of garlic in a little oil, add the chopped roasted Anaheim chiles, a teaspoon of ground cumin, half a teaspoon of dried oregano, and a cup of water or stock. Simmer 20 minutes, then blend smooth. Salt to taste. Use it on enchiladas, burritos, eggs, grilled meats, or anything that needs a Southwestern kick. Keeps a week in the fridge and freezes well.
Chiles rellenos
The dish Anaheim peppers are most famous for. Roast and peel 8 long Anaheim pods, slit each one open, and remove the seed core while keeping the Anaheim pod intact. Stuff each Anaheim pepper with a strip of melting cheese such as Oaxaca, Monterey Jack, or queso fresco. Dip in a fluffy egg batter (egg whites whipped to peaks, yolks folded in) and fry in hot oil until puffed and golden. Chiles rellenos are great for stuffing because Anaheim peppers hold their shape well when battered and fried. Serve immediately with a simple red or green tomato salsa. For a traditional alternative in this dish, the poblano pepper is a useful comparison and a useful contrast for flavor and texture.
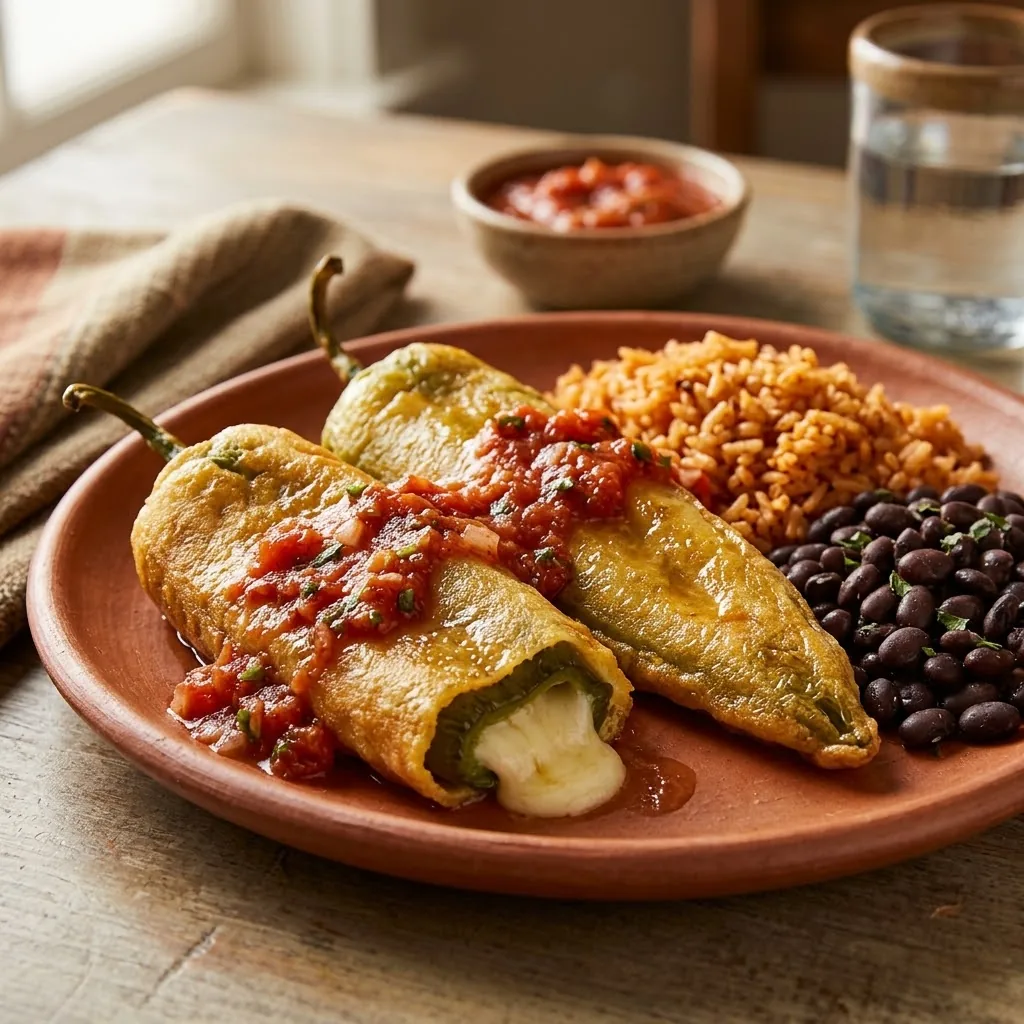
Stuffed Anaheim peppers with rice and beans
A weeknight friendly take on the same idea. Roast and peel 6 Anaheim pods. Mix 2 cups of cooked rice, 1 cup of cooked black beans, half a cup of corn kernels, a minced onion, a chopped tomato, a teaspoon of cumin, and salt to taste. Stuff the Anaheim peppers, lay them in a baking dish, spoon a cup of salsa verde or red enchilada sauce over the top, and bake at 190 degrees C (375 degrees F) for 25 minutes. Top with crumbled queso fresco and cilantro.
Roasted Anaheim salsa
Char 4 Anaheim peppers, 2 jalapeno, a small white onion, and 4 garlic cloves on a comal or under the broiler. Pulse in a blender with the juice of 1 lime, a handful of cilantro, and salt to taste. Adjust with water for the consistency you want. This salsa keeps 5 days refrigerated and turns anything grilled into a meal.
Anaheim peppers in soups, stews, and beans
Dice raw Anaheim peppers into a pot of pinto beans during the last 20 minutes of cooking, or stir chopped roasted Anaheim into chicken tortilla soup, white bean stew, or a simple corn and roasted-pepper chowder. Anaheim peppers add a warm base note without taking over the pot. Anaheim peppers also work in any recipe that calls for a gentle pod.
Anaheim peppers compared with other mild chilies
Anaheim peppers are a good fit for cooks who want a long, gentle chile with a thin skin that roasts quickly. A broad, thick-walled chile can hold a stuffed filling more firmly. Banana peppers are sweeter and even gentler, and they shine pickled. Padron peppers are small and usually picked young for the blistered tapa treatment, with the same one in ten chance of a hot one. Anaheim peppers are popular peppers and their heat level makes them more useful than very spicy peppers in everyday cooking. If you are deciding which mild chile to grow for everyday use, the mild chili peppers with big flavor guide walks through the best options for different kitchens and climates.
Nutrition and a note on the research
Anaheim peppers add flavor and a modest amount of heat to meals without many calories. Nutrient values vary by the exact food entry and preparation, so use USDA FoodData Central for the current value of the form you eat. Research on chili peppers and capsaicin has not established that eating Anaheim peppers treats or prevents any condition: an umbrella review found that many claimed health effects remain uncertain. Read the evidence review.
Frequently asked questions
What is the difference between Anaheim peppers and Hatch chiles?
Hatch chile refers to chile grown in the Hatch Valley of southern New Mexico. Anaheim and Hatch are not separate botanical species: both are New Mexican-type Capsicum annuum chiles, and cultivar and growing conditions affect their heat and flavor. NMSU’s cultivar history gives the relevant New Mexican pod-type context.
Are Anaheim peppers the same as green chiles?
Green chile is a general name for any long, mild chile harvested before it ripens red. Most green chiles sold in the United States, including the canned kind, are Anaheim type peppers. Hatch chiles, Anaheim peppers, and the canned Ortega product are all members of the same Capsicum annuum family.
Can I substitute Anaheim peppers for poblano peppers?
Yes, in many recipes. Anaheim peppers are longer and narrower with thinner walls, while the alternative is broader and thicker walled. Anaheim peppers roast and peel readily; it can be a sturdier choice for a stuffed dish. In sauces, either can work, but taste and heat vary by pepper.
How do I tone down an Anaheim pepper that turned out hotter than expected?
Remove the placenta and seeds, where most of the capsaicin sits. Pair the pepper with dairy (sour cream, crema, queso fresco, or melted cheese), fat (olive oil, avocado), or starch (rice, bread, beans). A little sugar or honey also tames heat without flattening flavor. If a dish is still too hot, dilute it with more of the non pepper ingredients rather than water.
When is the Anaheim pepper season?
Green Anaheim peppers are usually ready in mid to late summer, roughly 75 to 85 days after transplant. Red ripe Anaheim peppers follow 2 to 3 weeks later. In the home garden, you can expect harvests from mid July through the first frost in most temperate climates, with peak production in August and early September. Anaheim peppers have a long growing season in warm climates.
Do I need to wear gloves when handling Anaheim peppers?
For routine kitchen prep of green Anaheim peppers at typical heat ranges, gloves are usually unnecessary. Wear them if you are sensitive to chili oils, if you are processing a large batch of red ripe Anaheim peppers, or if the Anaheim variety you grew ran hot. Wash your hands, knife and cutting board with soap after handling, and avoid touching your eyes until you have cleaned up.
The bottom line
Anaheim peppers earn their place in a home kitchen because they do several jobs well. Anaheim peppers are gentle enough to slice raw into a salad, long enough to stuff for chile relleno, thin skinned enough to blister and peel in minutes, and productive enough in the garden that a few Anaheim plants feed a household through summer and into the freezer. Anaheim peppers can also be battered and fried, dried into California chiles, or frozen roasted for use all winter. Pick Anaheim peppers green for everyday cooking, leave a portion on the plant to ripen red for drying and roasting, and you have a year round Southwest pantry from a single bed.
