
Chili seedlings look tough, but the first six to eight weeks after sprouting decide how the season will go. Get light, water, temperature and feeding right at this stage and the plants pay you back with strong stems, even branching and an early flower set. Get them wrong and you spend the rest of the year nursing leggy, slow or pest-prone plants. This guide covers the stage from first true leaves to outdoor transplant, so the young plants you raise indoors turn into sturdy specimens ready for the bed, the border or a big container on the patio.
What chili seedlings need in the first weeks
Once a chili seedling has unfolded its first set of true leaves (the rough-edged leaves that follow the smooth seed leaves), its job shifts from sprouting to growth. From that point until it goes outside, the plant is building the root system and the stem it will rely on for the whole season. The four levers you control are light, water, temperature, and food. The fifth is air movement, which thickens the stem once the young plant is tall enough to flex.
A seedling that gets those five right looks compact, with short gaps between leaf pairs, deep green leaves, and a stem thick enough to support its own weight without a cane. One that is starved of light stretches toward the glass, grows pale, and flops. The symptoms almost always trace back to one of those five levers, not to the seed you bought, so it is worth learning to read them.
If you are just starting from seed and want the germination side, the guide to starting chili seeds the reliable way walks through temperature, compost and timing. This article picks up where that one ends.
Light: hours, intensity, and grow lights versus a sunny windowsill
Chili seedlings want 14 to 16 hours of light a day once the cotyledons are up. A south-facing windowsill in late winter gives a useful start, but the sun is low and the days are short. Most seedlings on the bench lean hard toward the glass and grow leggy within two weeks.
A grow light set 10 to 15 centimeters above the leaf canopy gives every plant the same strong light. Cheap LED panels sold for seedlings and microgreens are enough for a flat of young plants. Run the light on a simple plug-in timer so the photoperiod is consistent. The seedlings do not need darkness to rest, but they do benefit from a clear day-night rhythm, so 16 hours on, 8 hours off is a workable default.

Keep adjusting the height of the light as the plants grow. If the leaves curl down or show pale, bleached patches, the light is too close. If the stems stretch and the seedling leans, the light is too far away or too weak. Rotate the tray a quarter turn every couple of days if you are working with a sunny spot, so the lean does not set in one direction.
Watering seedlings without overwatering
Young plant roots are small, so the compost dries out fast in a small cell or tray, but it also stays wet for too long if you water too heavily. Both extremes cause problems. A bone-dry plant wilts and stalls; a waterlogged one develops damping off, a fungal collapse that takes out seedlings overnight. The aim is moist, not wet.
Bottom watering is the easiest way to get this right. Stand the cells in a shallow dish of room-temperature water and let the compost draw it up through the drainage holes for ten or fifteen minutes, then lift them out and let the excess drain away. Water from the top only when the surface feels dry to a fingertip. For a closer look at how this scales up once the plants are bigger, see the guide to watering established chili plants.

If you see green algae on the surface of the compost, the cells are staying too wet for too long. Loosen up the watering, improve airflow around the flat, and scrape off the algae before it smothers the stem at the soil line.
Temperature and humidity for chili seedlings
Daytime temperatures of 22 to 27°C (72 to 80°F) and nighttime temperatures no lower than about 18°C (65°F) cover most Capsicum varieties while they are building leaves. Cooler nights slow growth without killing the plant; colder nights below 10°C (50°F) can check growth for a week or more. Capsicum chinense varieties prefer the warmer end of that range, while Capsicum annuum types tolerate the cooler end.
A heated propagator with the lid off is useful once the seedlings are past the sprouting stage, because it keeps the root zone warm even if your house is on the cool side. A soil thermometer is more useful than an air thermometer at this point, because root temperature drives growth more than air temperature does.
Humidity is less important after sprouting than during it. A clear plastic dome over the flat helps during the first week, but leave it cracked or off once the seedlings have true leaves, since stagnant humid air invites gray mold and damping off.
When to start feeding chili seedlings and how much
Young plants do not need feeding for the first week or two after the cotyledons open, because the seed itself feeds them. Once the first true leaves are fully open, switch to a half-strength balanced liquid feed every seven to ten days. A standard tomato feed or a general-purpose seaweed feed both work. Look for an N-P-K ratio close to 5-5-5 or similar in the early stage; you can move to a higher potassium feed later in the season, when the plants start flowering.
Over-feeding seedlings is more common than under-feeding them. Strong feed on a small root system scorches the leaf edges and locks out calcium. If you see brown leaf tips in the first month, cut back to plain water for ten days, then resume at half strength.
Potting up: moving seedlings into bigger pots
Most seed trays and cell packs run out of root room four to six weeks after sowing. The tell is roots showing through the drainage holes or the compost drying out within hours of watering. Pot up into 8 to 10 centimeter pots using a fresh, peat-free multipurpose compost, or a mix of multipurpose compost with about 20 percent perlite for extra drainage. Set the seedling at the same depth it sat in the cell, and stake a leggy plant instead of burying its stem.
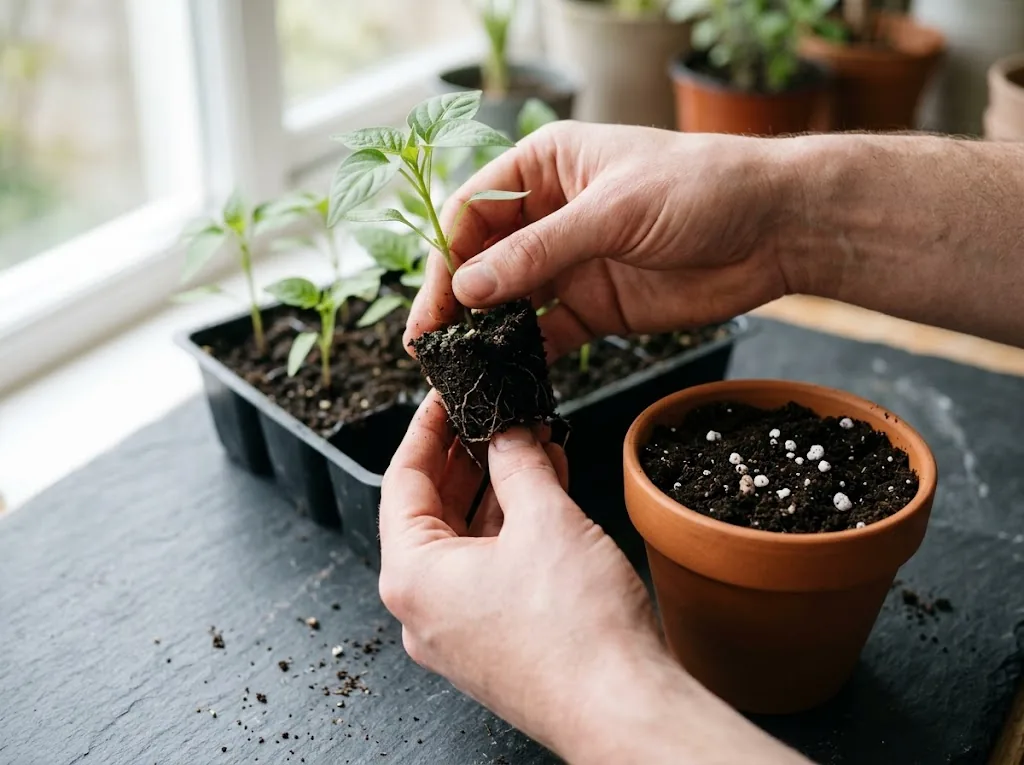
Handle seedlings by the leaf, not the stem. A crushed stem rarely recovers, while a torn leaf is replaced within a week. Water the pot gently after potting up, then keep the plant out of strong sun for a day or two while the roots re-establish.
Pot on again into 15 centimeter or even 20 centimeter pots once the roots fill the 10 centimeter pot. Most chili plants do not need anything larger than a 20 centimeter pot until they move to their final container or bed, and a smaller pot with regular watering produces a stronger plant than a large pot of constantly wet compost.
Hardening off before transplanting outdoors
Plants raised indoors have soft leaves and thin cuticles, and a single cold night or windy afternoon outside can wreck them. Hardening off is the slow adjustment that toughens them up. Plan on seven to fourteen days before the planting-out date.
Start by putting the pots outside in a sheltered, shaded spot for an hour on a mild day, then bring them back in. Each day, extend the time outside by an hour or two and move them into slightly more direct light. After four or five days, leave them out overnight if the temperature is staying above about 10°C (50°F). By the end of the second week, they should handle full sun and a breeze for the whole day.
Skip the hardening-off step only if you are moving plants straight into a heated greenhouse or polytunnel with ventilation, where the conditions indoors and outdoors are already similar. For chili plants going out into open ground, the hardening-off week pays for itself many times over in stronger early growth.
Planting out in the bed or final container
Wait until nights stay above about 10°C (50°F) and the soil has warmed to at least 15°C (60°F), which usually means a week or two after the last frost. Plants with several sets of true leaves and a sturdy stem cope best. Water the seedlings well an hour beforehand, then plant them at the same depth they sat in their pots.
Space compact and medium types about 30 to 60 centimeters (12 to 24 inches) apart, and large, sprawling types 60 to 90 centimeters (24 to 36 inches) apart. Water in well, and shade the young plants with a light row cover for the first day so the sun does not scorch their soft leaves.
Troubleshooting common chili seedling problems
Leggy seedlings that flop over almost always signal too little light or too much heat without enough light to match. Move the tray closer to the window or lower the grow light, and brush your hand over the tops of the young plants once a day. The light touch mimics wind and tells the stem to thicken.
Yellow leaves between the veins on a small plant usually mean hungry roots rather than sick leaves. Step up to a balanced feed at half strength and check that the pot is not waterlogged. If yellowing shows only on the oldest leaves and the new growth is green, the plant is just moving nutrients around and there is nothing to fix.
Purple undersides on leaves and stems suggest a chill. Move the flat to a warmer spot and check the soil temperature. If the compost smells sour or you see fungus gnats hovering over the surface, you are overwatering. Let the surface dry between waterings and consider a thin layer of coarse sand or vermiculite on top of the compost to break the fungus gnat life cycle.
Where to go next
If you are starting your chili journey at the beginning of the year, the broader guide to growing chili peppers covers the full season from sowing through harvest. Once your plants are hardened off and planted out, the work shifts from protecting them to keeping them steadily watered and fed through the summer.
