Sage (Salvia officinalis) earns its place in almost any kitchen garden because it asks for very little and gives back a lot. Tuck it into a sunny corner with well-draining soil, water sparingly, and a single plant will reward you with savory sage leaves for roasted meats, pasta, beans, and tea for years on end. Whether you have a backyard bed, a small patio, or just a bright windowsill, sage is easy to grow and a forgiving first herb for new gardeners.
This guide walks through everything that matters for growing sage: where this Mediterranean herb thrives, how to start sage from seed, soft cuttings, or a starter plant, when to set plants out, how to keep them alive through summer heat and winter cold, and how to take leaves without slowing the plant down. By the end you should know which sage variety suits your climate, how to prune an aging plant back into shape, how to dry sage for storage, and what to do with the harvest once the foliage is off the stem.
Why sage is worth growing
Common sage, also called garden sage or culinary sage, is reliably hardy in USDA zones 4 through 8, which means a single plant can produce for five to ten years once it settles in. The gray-green sage leaves are as ornamental as they are useful, and the small purple flowers that show up in early summer pull in bees and other pollinators. Sage is one of the easiest savory herbs to keep alive because it actually prefers the same lean, dry conditions that frustrate fussier plants. New gardeners tend to overwater it. Once you stop that, sage performs year after year, even in poor soil.
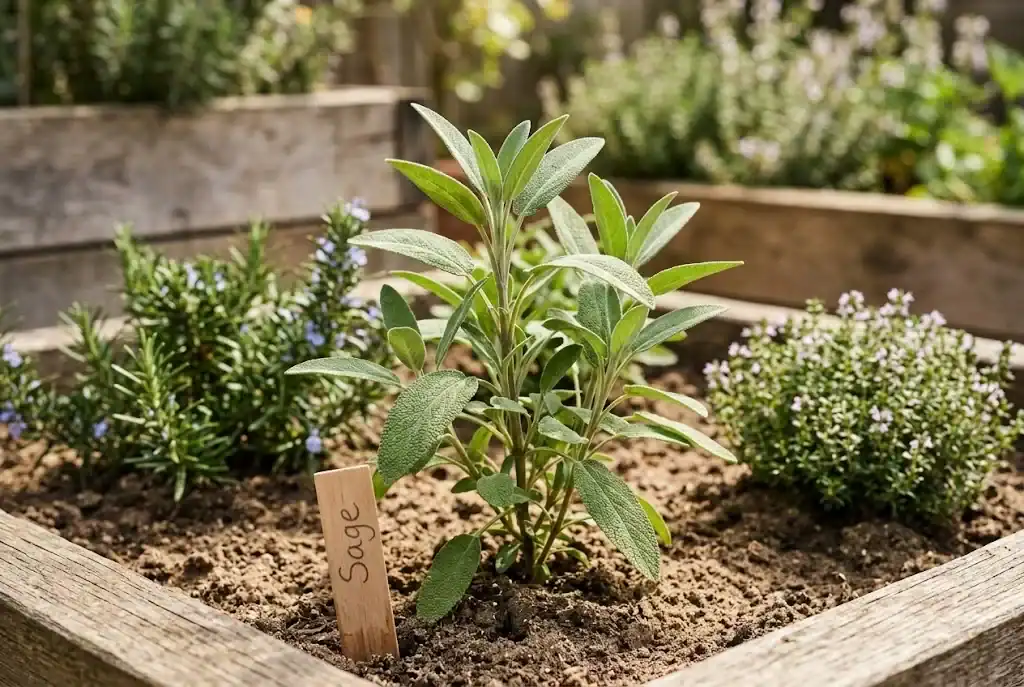
On the kitchen side, fresh sage carries a savory, slightly peppery flavor that dried sage only hints at. A few leaves fried in butter turn a simple pasta into something memorable, and a small bundle of stems dropped into a pot of beans softens the pungency of the allium. If you grow only one culinary sage for savory cooking, sage is a strong candidate. Sage is also a useful pollinator plant near the vegetable garden, where its flowers pull in bees and other beneficial insects.
What sage needs to grow well
Before you plant anything, think about the four conditions this herb actually cares about. Get any one wrong and the plant will struggle; get all four right and it is nearly impossible to fail.
- Full sun. Sage thrives in full sun with at least six hours of direct light a day, and a south-facing wall, fence, or windowsill is ideal. Light shade is tolerated, but the leaves get leggy, the flavor weakens, and flowering drops off. Plenty of sunlight through the day keeps sage stems sturdy and the foliage tight.
- Well-drained soil. Sage hates wet feet. In the garden, plant it in sandy ground or work in aged compost and a handful of coarse sand. In a pot, use a well-draining mix and never let the container sit in a saucer of standing water.
- Slightly lean fertility. Sage does best in soil that is not especially rich. A few handfuls of aged organic matter mixed in at planting is plenty. Skip the heavy fertilizer; soft leafy growth in rich ground is more vulnerable to cold damage and has weaker flavor.
- Good air circulation. Crowded sage stays damp and invites mildew. Give each plant enough room to keep its foliage dry after rain.
Start sage from seed, cuttings, or a starter plant
Each method has its place. Pick the one that fits your timeline. New gardeners often learn how to grow sage from a small starter plant, while patient gardeners enjoy starting sage from seed.
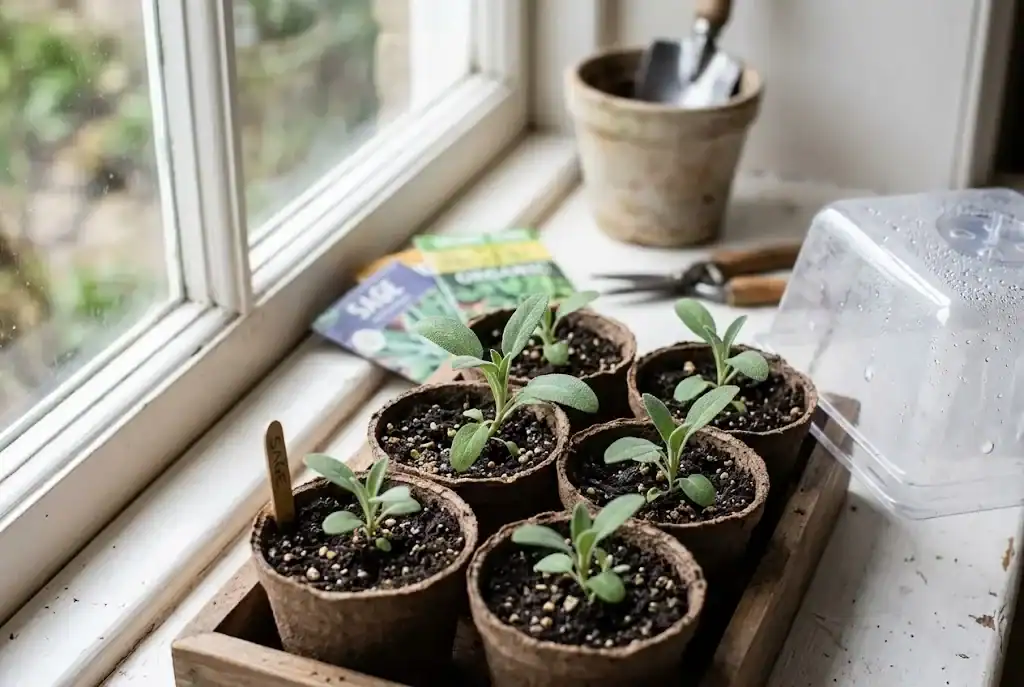
Seeds are the cheapest option but the slowest. Sage seeds germinate slowly and unevenly, and the seedlings take most of a growing season to reach a useful size. Sow sage seeds indoors under grow lights six to eight weeks before your last frost. Press them into the surface of moist seed-starting mix, cover them lightly, and keep them at about 70 degrees F. Expect germination in 14 to 21 days. Set the seedlings out once the soil has warmed and all danger of frost has passed.
Cuttings are the fastest way to get a plant that is identical to the parent and an easy way to propagate sage. Snip a four-inch stem from a healthy plant, strip the leaves from the lower half, dip the cut end in rooting hormone if you have it, and tuck the cutting into a small pot filled with damp mix or coarse sand. Keep it in bright indirect light and irrigate just enough to keep the medium barely moist. Roots usually form in three to four weeks. Cuttings taken in late summer overwinter easily on a sunny windowsill and are ready to set out the following spring. Container-grown sage can also be propagated from cuttings any time the plant is in active growth.
Starter plants from a nursery are the easiest route for a first-time grower. Buy a young plant in spring, harden it off for a week before setting it out, and you will have usable foliage by midsummer. Most culinary sage sold as young plants is Salvia officinalis, the common sage used in cooking. There are several varieties of sage worth considering once you have a healthy plant established and want to expand your herb garden.
Set new plants out in spring as soon as the soil is workable. Most sage growers find that spring planting gives the plant the longest time to establish before winter.
When and where to plant
Sage is a Mediterranean herb, which gives away most of what it likes: bright sun, dry air, and a long warm growing season. The best time to set out sage is in spring, once the soil has warmed to about 60 degrees F and all danger of frost has passed. In mild climates you can also plant in early fall, giving the roots time to settle before winter dormancy. Setting new plants out in spring gives them the full season to establish.
Choose a permanent spot. Sage does not like being moved once it is established. The plant will spread two to three feet wide and reach 18 to 24 inches tall at maturity, so space plants 18 to 24 inches apart in the bed. In a perennial border, give sage room at the front edge where its lower leaves can bask in sun and air. If you are growing sage in pots, choose a container at least 10 to 12 inches across; growing sage in pots keeps the roots contained and makes it easy to move the plant with the seasons.
Plant in a pot or in the ground
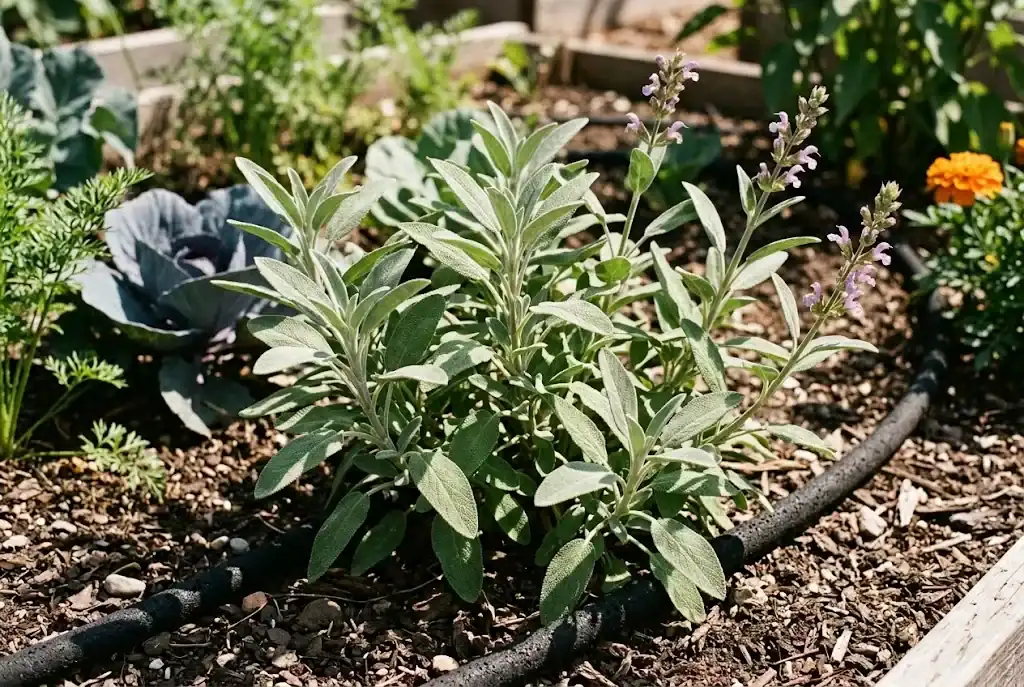
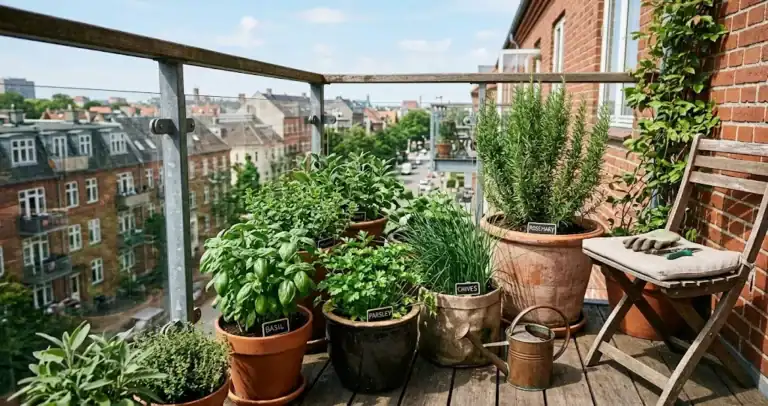
Sage performs happily in either setup. Container growing is the right answer for balconies, paved courtyards, and anyone gardening in heavy clay soil that does not drain freely. Growing sage in pots also makes it easy to move plants to a sheltered spot during cold snaps. Choose a pot at least 10 to 12 inches across with plenty of drainage holes. Terracotta breathes and dries evenly, which suits potted sage better than plastic. Fill with a well-draining potting mix blended with a little aged organic matter, then plant at the same depth the young plant sat in its nursery pot.
For outdoor sage in a garden bed, dig a hole twice the width of the root ball and the same depth. Loosen the roots gently if they are circling the pot. Backfill with the native soil mixed with a few handfuls of aged organic matter. Soak the area well, then ease off. Sage prefers a dry start to a wet one.
Sage also grows well on a sunny windowsill. Growing sage inside means smaller, slower plants, but the leaves are just as flavorful. Place the pot where it gets at least six hours of direct light, and rotate the container every few days so the plant does not lean toward the window. If natural light is limited, a simple grow light set on a timer keeps potted sage productive through the darker months.
Watering without overwatering
Sage is drought-tolerant once established, and too much moisture is the fastest way to kill it. For a newly planted sage, soak the root zone deeply once a week for the first month to help the roots settle. After that, let the soil dry out between drinks. In the garden, a deep soak every two to three weeks in dry weather is usually enough. In a pot, irrigate when the top inch of medium feels dry. Sage kept in cooler conditions needs even less.
If the leaves start to yellow or the stems go soft at the base, you are giving it too much. Cut back, let the soil dry out, and the plant usually recovers. If the leaves start to droop and the medium is bone dry, soak it thoroughly and watch for fresh growth within a day.
Light, soil, and climate
Sage grows outdoors year-round in USDA zones 4 through 8. In colder zones, the top growth dies back in winter and resprouts from the roots in spring. Mulch the crown with a few inches of straw or shredded leaves after the ground freezes to protect the roots through hard freezes. In warmer zones, sage stays evergreen through winter and may even flower off and on through mild spells.
Sage prefers a soil pH between 6.0 and 7.0, which is roughly neutral. Most garden ground sits in this range. If you are not sure, a basic soil test from your local extension service will tell you. Working organic matter into the planting hole and top-dressing yearly with a thin layer is usually enough to keep sage happy without further fuss.
Prune sage to keep it producing
Sage gets woody if you never cut it back. The trick is to start early and never cut into the bare wood below the leaves. Pinch the growing tips regularly during the first year to encourage bushy growth, then in early summer, after the main flush of foliage, prune the upper third of each stem just above a pair of leaves. The plant will branch out from those cuts and push a second wave of tender leaves you can pick later in the season. Soft cuttings from the prunings root easily and give you free new plants.
Every three or four years, even well-tended sage becomes woody at the base with thin foliage on top. At that point, take softwood cuttings from the healthy upper growth, root them in a small pot of damp mix, and replace the old plant. Established plants thrive with regular renewal, but they do not regenerate from hard cuts into old bare stems. Taking cuttings is also a good insurance policy if a hard winter knocks back an old plant you would hate to lose.
Harvest sage without slowing it down
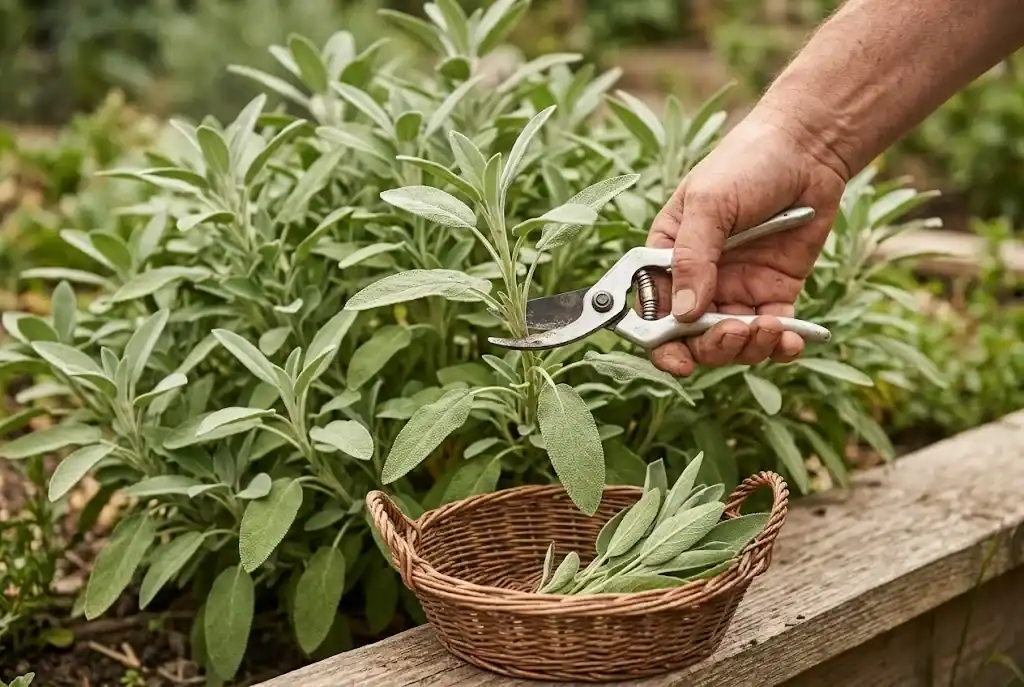
Pick leaves in the morning after the dew has dried but before the sun hits the plant hard. The essential oils are most concentrated then, and the flavor is at its best. Snip whole stems rather than individual leaves, taking no more than a third of the foliage at one time. The plant needs the rest of its leaves to keep producing new growth through the rest of the season.
For everyday cooking, a few fresh leaves pulled from a stem are usually enough. For larger pickings to dry sage or freeze, cut a handful of sage stems, rinse them quickly, pat them dry, and either hang them in small bundles in a warm airy spot out of direct sun, or strip the leaves and dry them on a screen. Once fully dry, store sage leaves in an airtight jar away from light. If you want to learn how to keep your harvest usable for months, our guide on how to store sage walks through drying, freezing, and infusing.
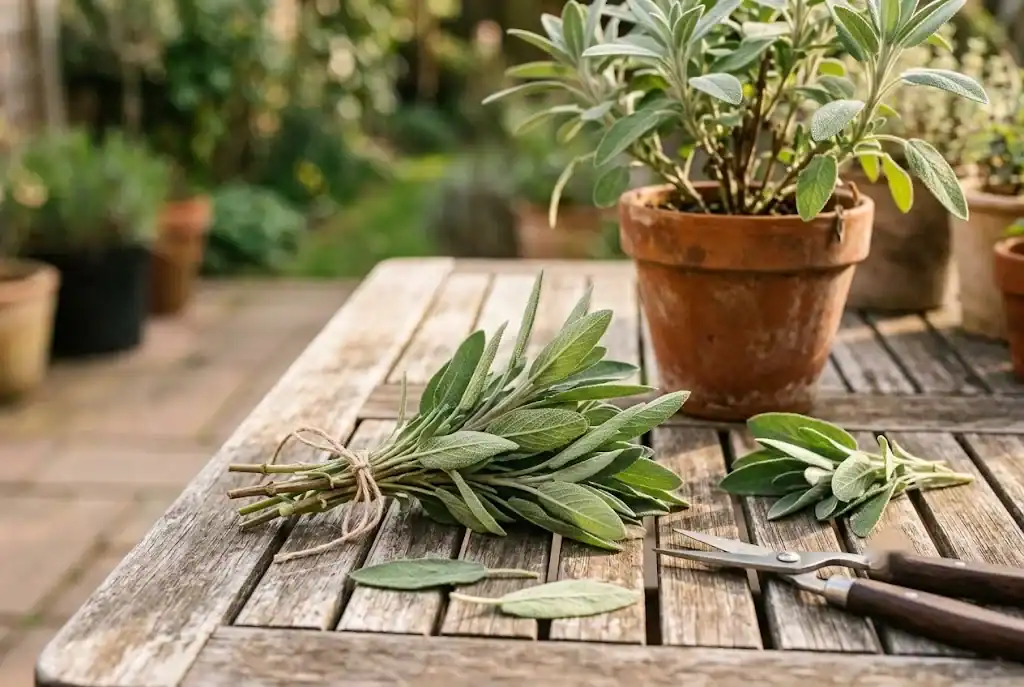
Sage flowers are also edible and make a pretty garnish for salads and butters. If you want a heavier leaf pick later in the season, pinch the flower buds off as they form to keep the plant in vegetative growth.
Common problems and how to fix them
Sage has few pest problems, but a few issues come up reliably.
- Powdery mildew shows up as a white dusty coating on the leaves, usually in humid weather or where air circulation is poor. Thin out crowded stems, irrigate at the base of the plant rather than over the top, and remove badly affected leaves. Badly infected plants are best pulled and replaced with a fresh specimen in a sunnier, less crowded spot.
- Spittlebugs leave frothy white blobs on the stems in late spring. They are unsightly but harmless. A strong spray knocks them off.
- Root rot happens when soil stays wet for too long. Yellowing lower leaves and a soft base are the warning signs. Lift the plant, trim away rotted roots, and replant in drier soil or a fresh pot.
- Old bare stems mean the plant is old or has been neglected. Take cuttings to start a replacement, then remove the old plant.
Deer and rabbits tend to leave sage alone because of its aromatic foliage. That is one of the quiet benefits of planting it along the edge of a vegetable garden.
Varieties worth knowing
Common sage (Salvia officinalis) is the workhorse for cooking, but a few cultivars are worth a spot for their looks or their flavor.
- Berggarten sage has rounder, broader leaves and a slightly milder flavor. It rarely flowers, which keeps the foliage producing through summer.
- Purple sage has the same flavor as common sage but with purple-tinged foliage that looks striking next to gray-green herbs.
- Tricolor sage has splashes of cream, pink, and green in the leaves. It is mostly ornamental, though still edible.
- Golden sage has yellow-green variegated leaves and a softer flavor. It does well in containers because of its smaller size.
- Pineapple sage (Salvia elegans) is a different species with a bright pineapple scent and red flowers that pull in hummingbirds. It is tender and grown as an annual in cold climates.
For most kitchens, common sage is the right starting point. Add a Berggarten or purple sage as a decorative second plant if you have space.
Propagate new plants from established sage
Once you have one healthy sage plant, you can keep the line going without ever buying another. There are two reliable ways to propagate sage from cuttings or layers.
Layering works well for outdoor plants: pin a low stem to the ground with a small stone, cover the middle of the stem with soil, and wait a few months for roots to form. Cut the new plant free from the parent and transplant.
Soft cuttings taken in late summer root in three to four weeks as described above. Overwinter the rooted cuttings on a sunny windowsill, then set them out in spring. Within a year you will have a second mature plant producing as well as the original.
For sage grown in pots on a windowsill, take sage cuttings in late winter or early spring to refresh leggy plants or replace an aging specimen. New sage cuttings root quickly under grow lights and produce a bushier plant than the original.
What to do with sage once it is established
Beyond the obvious uses in stuffing, browned butter sauces, and roasted poultry, sage has a long culinary tradition worth exploring. Fry sage leaves in a little butter until crisp and use them as a garnish for pasta or gnocchi. Steep a small handful of fresh leaves in hot water with a little honey for a soothing herbal tea. Add sage to a simmering pot of beans to soften the bite of onion and garlic. The flavor pairs especially well with fatty meats, winter squash, and brown butter.
For gardeners who like to plan ahead, sage is also a useful pollinator plant. Its flowers pull in bees and other beneficial insects through the summer, so tucking a plant or two near the vegetable garden gives pollinators a reason to visit while you pick leaves for the kitchen.
Frequently asked questions
Does sage come back every year?
In USDA zones 4 through 8, sage is reliably hardy and resprouts from the roots each spring. In colder zones, the top growth dies back in winter and the plant may not return if the ground freezes deeply without mulch protection. In warmer zones, sage stays evergreen and may flower off and on through mild winters.
Can sage grow inside?
Yes. Sage grows well in a sunny window or under grow lights. Use a well-draining mix, irrigate sparingly, and rotate the pot every few days so the plant does not lean toward the light. Plants kept inside stay smaller than outdoor ones but the leaves are just as flavorful.
Why is my sage plant sparse and leggy?
Older sage plants develop bare stems at the base over time. Light, regular pruning delays this, but most sage plants need replacing every four to five years. Take cuttings from the healthy upper growth, root them, and start a fresh plant. Established plants cannot regrow from hard cuts into old bare stems.
What should you not plant next to sage?
Sage does not love wet conditions, so avoid planting it next to herbs that need steady moisture such as basil, chives, or mint. It pairs well with other Mediterranean herbs like rosemary, thyme, oregano, and lavender, all of which want the same dry sunny conditions.
When is the best time to pick sage?
Pick in the morning after the dew has dried but before the sun gets hot. Snip whole stems rather than individual leaves and never take more than a third of the foliage at one time. For more on picking and what to do with the cut stems, see our guide on how to harvest sage.
The bottom line
Sage is one of the easiest perennial herbs to grow, and one of the most useful in the kitchen. Give it full sun, well-drained soil, and a light hand with the watering can. Pinch it back regularly to keep it bushy, pick no more than a third of the foliage at a time, and replace it every few years with a cutting from your own stock. Do that and you will have sage in the garden, sage on the windowsill, and sage in the kitchen year after year.
For a broader walk through planning and starting a herb garden from scratch, our beginner’s guide to growing kitchen herbs covers site selection, soil prep, and the easiest herbs to start with alongside sage.