Few backyard crops offer the sheer satisfaction of digging up a buried treasure of fresh garden spuds. Learning how to grow potatoes is surprisingly simple once you understand how these underground tubers develop along buried stems. When provided with loose soil, steady moisture, and full sun, a modest patch can yield an abundant harvest of tender new potatoes in early summer and hearty storage potatoes for the winter pantry. Any home grower can produce a heavy yield with basic hand tools and attentive vegetable care.
Potatoes are cool-season vegetables that thrive when planted in the ground during early spring. Unlike most vegetables started from true botanical seed, potatoes grow from specialized tuber cuttings known as seed potatoes. Each eye on the seed piece develops into a leafy upright stem that produces lateral underground stolons where new potato tubers form and swell. For home growers planning a mixed edible plot with companion herbs like garlic and chives, understanding soil, spacing and the rest of the basics provides a helpful structural foundation before digging your first planting beds.
Choosing and Preparing Certified Seed Potatoes
The first step in any successful growing season is selecting healthy certified seed stock. Always purchase certified disease-free seed potatoes from a reputable nursery rather than trying to plant grocery store tubers. Commercial eating potatoes are frequently treated with sprout-inhibiting substances to prolong shelf life, and they may harbor latent fungal or bacterial pathogens that can persist in soil for years.
A home gardener can choose among several distinct varieties of potatoes based on maturity time and culinary use:
- Early potatoes: Fast-maturing potato varieties such as Red Norland and Yukon Gold potatoes mature in 65 to 80 days. Their tender skins and rapid maturity make them best suited for boiling, roasting, or tossing into fresh summer salads.
- Mid-season varieties: Types like Kennebec and Chieftain take 80 to 100 days of growing in the ground to reach maturity, offering dependable yields and excellent all-purpose cooking qualities.
- Late-season storage potatoes: Late varieties such as Russet Burbank and German Butterball require 100 to 130 days of time to grow, producing thick-skinned tubers built for long cellar storage.
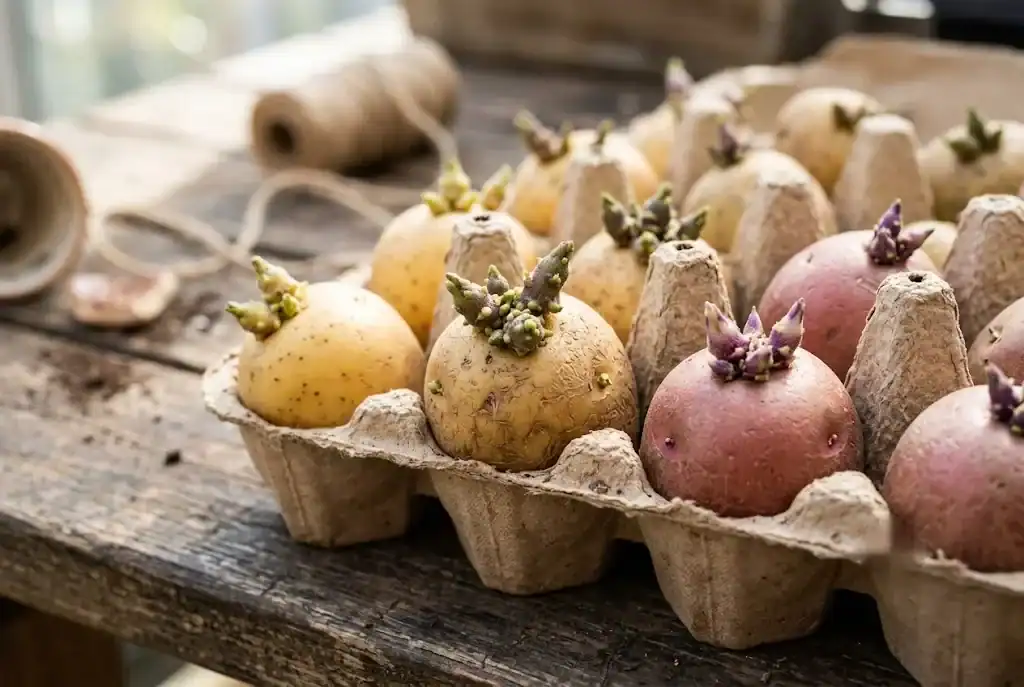
To give your plants a head start while waiting for seed potatoes to arrive, begin chitting your seed tubers about two to four weeks before outdoor planting begins. Place the whole tubers upright with the majority of eyes facing upward in open egg cartons or shallow wooden flats. Keep them in a bright, cool indoor room with temperatures around 50 to 60 degrees Fahrenheit. Within a few weeks, short, sturdy green sprouts will emerge from the eyes, accelerating root establishment once planted in the ground.
Small, egg-sized seed tubers can be planted whole. If working with larger potatoes, use a clean, sharp knife to cut the potatoes into blocky seed pieces roughly two inches across, making sure each piece of potato contains at least one or two prominent eyes. Allow the freshly cut seed pieces to rest at room temperature for one to two days before planting. This short drying period allows the cut surfaces to form a protective callous that resists soil rot.
Soil Preparation and Planting in the Garden
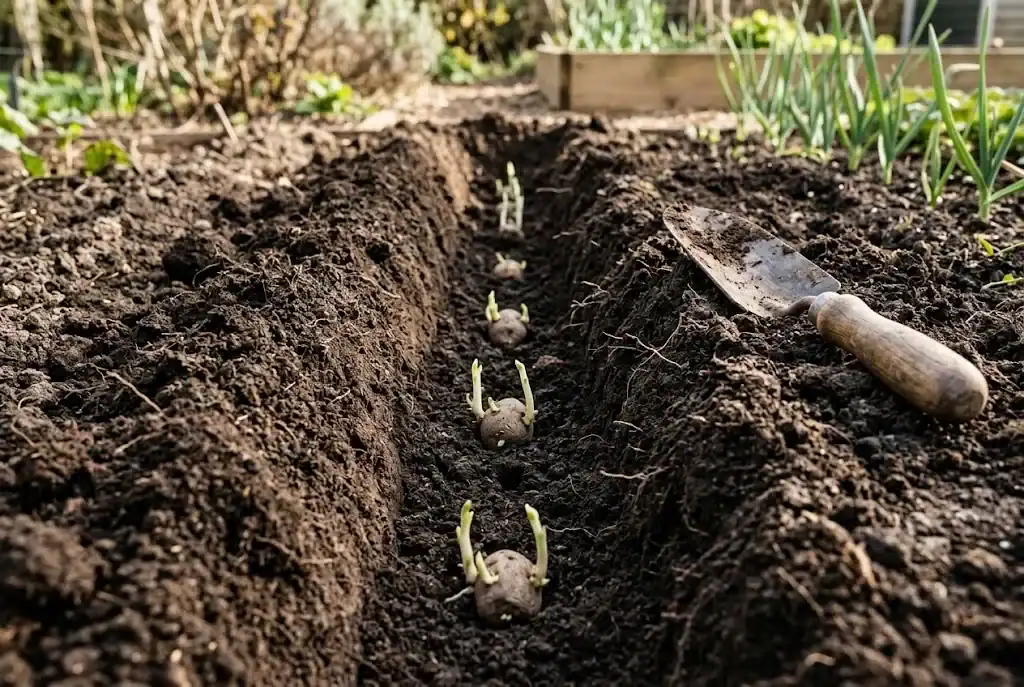
Potatoes require loose, well-draining garden soil rich in organic matter to expand without restriction. Heavy clay soils restrict tuber development and cause knobby, misshapen spuds, while waterlogged beds invite fungal rot. Work generous amounts of aged compost or well-rotted leaf mulch into the planting area to a depth of 10 to 12 inches. Aim for a slightly acidic soil pH between 5.8 and 6.5, which improves the physical properties of soil and helps suppress common potato scab.
The ideal time to plant potatoes in the garden arrives in early spring when soil temperature reliably reaches 45 to 50 degrees Fahrenheit, usually two to four weeks before your last frost date. While emergent green leaves are sensitive to hard freezing weather, buried seed pieces tolerate light frost in early spring soil.
The traditional trench method remains one of the most reliable ways to plant seed in the home garden:
- Dig a straight trench 6 to 8 inches deep, spacing rows roughly 3 feet apart to leave adequate room for subsequent earthing up.
- Place the seed potato pieces in the bottom of the trench, cut side down and sprouts pointing upward, spacing them 12 inches apart along the row.
- Cover the seed potatoes with 3 to 4 inches of soil mixed with organic matter, leaving the remainder of the excavated soil along the ridge.
- Water the furrow thoroughly to settle the soil around the developing root system.
Essential Care: Watering, Feeding, and Hilling
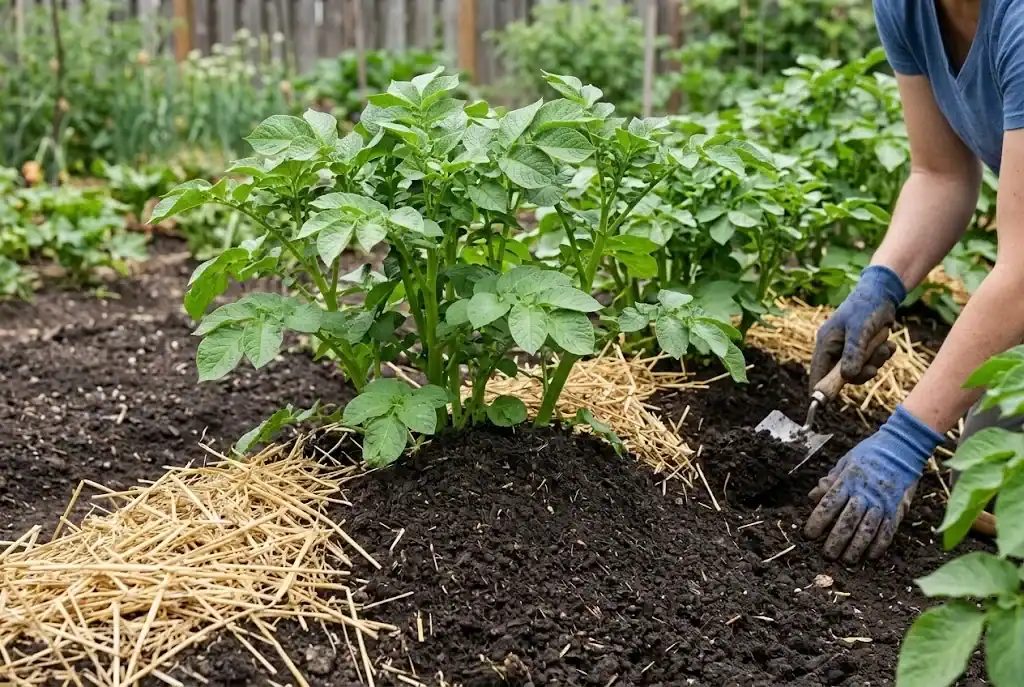
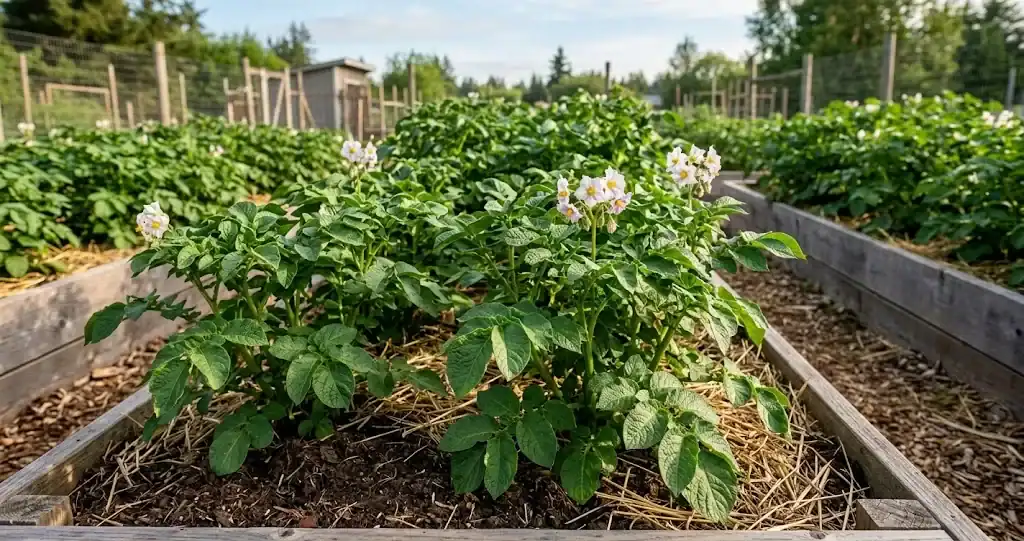
As the potato plant grows and stems reach 6 to 8 inches above the soil line, begin the essential practice of hilling. Use a garden hoe to draw two to three inches of loose soil or aged compost up around the base of the plants to bury the lower stems while leaving the top green leaves exposed, then lay clean straw mulch over the ridge to conserve moisture. Repeat this mounding process every two to three weeks until you have built a broad ridge 8 to 12 inches tall.
Mounding soil serves several vital functions and is an indispensable part of growing potatoes. It creates a cool, loose root zone where heavy clusters of new tubers can expand freely. More importantly, mounding shields developing tubers from direct sunlight. When tubers are exposed to light, they turn into green potatoes as they synthesize chlorophyll and produce solanine, a toxic, bitter glycoalkaloid compound. According to research from Utah State University Extension, preventing light exposure through proper ridging and mulching keeps potatoes safe, palatable, and free from green skin discoloration.
Consistent moisture is critical throughout the season. Potatoes need about one inch of water per week from rainfall or supplemental irrigation. Maintain evenly moist soil from the time flowers appear until the vines begin to yellow. Uneven watering causes maturing potatoes to crack, develop knobby second growth, or form internal hollow cavities. Apply an organic balanced fertilizer blend rich in potassium and phosphorus during early growth, avoiding excess nitrogen feeding which stimulates lush leafy top growth at the expense of tuber size.
Managing Garden Pests and Plant Diseases
Vigilant monitoring keeps common pests from damaging your potato plants. The most widespread pest is Colorado potato beetles. Adult beetles and reddish-pink larvae feed voraciously on leaf tissue and can defoliate entire plants if left unchecked. Inspect the undersides of leaves weekly for clusters of bright orange-yellow eggs, crushing any egg masses and hand-picking adult beetles into soapy water.
Fungal diseases like early and late blight can affect foliage during humid, wet weather. To minimize disease pressure, water the base of the plants using drip irrigation rather than overhead sprinklers, provide generous spacing for air circulation, and mulch with clean straw. Practice a three- to four-year rotation schedule, avoiding planting potatoes in ground where tomatoes, peppers, or eggplants grew recently.
As the season progresses and plants reach peak maturity, knowing how to harvest tater without puncturing delicate tuber skins will protect the quality of your entire seasonal yield.
Harvesting and Curing Potatoes
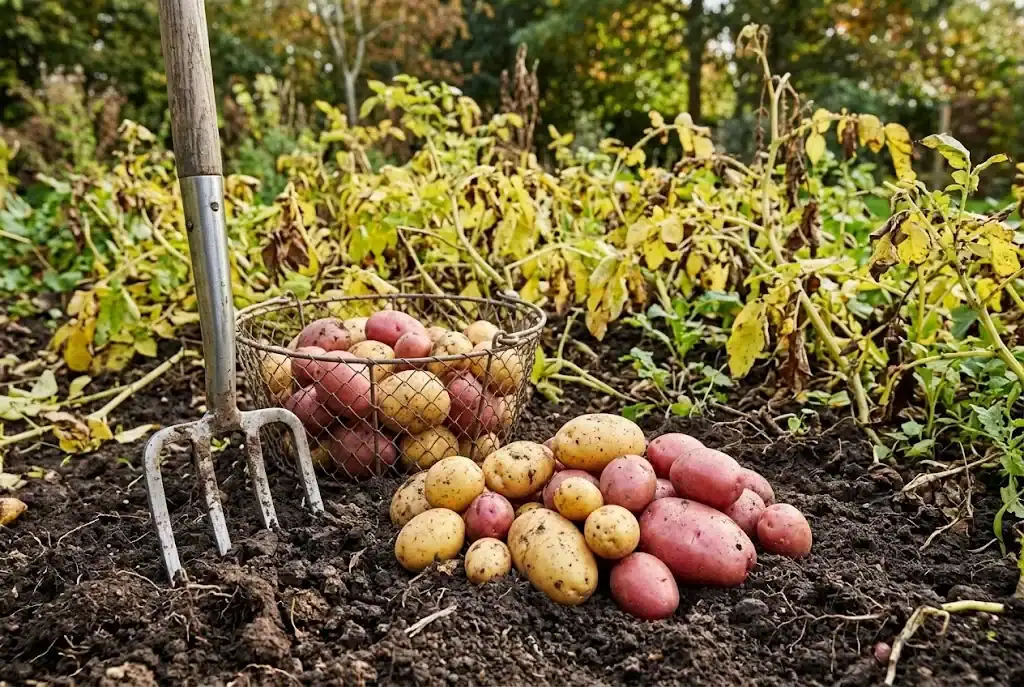
Gardeners can enjoy two distinct harvests from a single planting when potatoes are ready to harvest:
- Harvest new potatoes: About two to three weeks after the plants finish blooming, you can gently reach into the soil and unearth a few small, tender baby potatoes. Probe the outer edges of the mound with your fingers, take what you need for dinner, and leave the main plant intact to continue growing.
- Maincrop storage potatoes: For mature storage tubers, wait until the above-ground foliage dies back in late summer or early autumn. Once the vines die back naturally, leave the tubers undisturbed in dry ground for 10 to 14 days so the outer skins can toughen and cure.
Choose a dry, overcast day to dig the potatoes. Push a sturdy digging fork at least 12 inches away from the base of the plant to avoid slicing into tubers, then gently lever the root clump upward to harvest potatoes. Brush away loose soil by hand without washing dirty potatoes with water, as excess moisture encourages fungal pathogens during storage.
After bringing in your crop, learning how to store tater properly in a dark root cellar or well-ventilated space with high humidity kept at 45 to 50 degrees Fahrenheit ensures you can successfully store potatoes for months of dependable culinary use.