Fresh dill (Anethum graveolens) is one of the most rewarding culinary crops you can cultivate in a home garden. Known for its delicate, feathery leaves and aromatic yellow umbel blossoms, this annual brings bright, anise-like flavor to summer cooking, fresh salad bowls, and homemade dill pickles. Whether you are cultivating a sprawling garden bed or container growing on a sunny balcony, learning how to grow dill successfully comes down to understanding a few basic horticultural principles.
Dill is an annual in the Apiaceae family, making it a close botanical relative of carrots, fennel, and parsley. Unlike woody perennials that return year after year, this annual completes its life cycle in a single growing season. It grows rapidly from seed, developing tall, hollow stems crowned with lacy leaves and broad flower head umbels that attract beneficial pollinators to your vegetable patch. If you are planning an herb garden from scratch, this versatile crop is an ideal staple to include alongside basil, chives, and parsley.
Ideal Growing Conditions: Sunlight, Soil, and Location
To cultivate vigorous, healthy plants with abundant aromatic leaves, providing the right environmental conditions from the start is essential.
Sunlight and Temperature Requirements
This annual performs best in full sun, requiring 6 to 8 hours of direct sunlight daily. While the crop can tolerate light afternoon shade in exceptionally hot southern climates, insufficient light causes the stems to stretch, become floppy, and lose their vibrant flavor. Dill prefers moderate temperatures between 60°F and 75°F (15°C to 24°C). When summer temperatures consistently exceed 85°F (29°C), young plants naturally accelerate toward blooming, a process known as bolting.
Soil Composition, Drainage, and pH
The dill plant thrives in loose, well-draining soil that is rich in organic matter. Heavy clay soils that hold excess water can rot delicate root systems, while overly sandy soils dry out too quickly. Before sowing seeds, work two to three inches of aged compost into the top six inches of your garden bed. Dill prefers a slightly acidic to neutral soil pH between 6.0 and 7.0. Ensuring thorough drainage is vital, as stagnant moisture is one of the quickest ways to damage a young seedling.
Wind Protection
Because mature plants easily reach 3 to 4 feet in height on slender, hollow stems, tall foliage can be blown over easily during intense summer storms. Choose a location protected from strong winds, such as near a garden fence, alongside sturdier companion vegetables, or against the sheltered side of a raised bed.
How to Grow Dill from Seed
Starting dill from seed is straightforward and reliable. In fact, starting from seed is far superior to buying nursery starter pots because of the botanical structure of the root system.
Why Dill Should Be Sown Directly
The crop develops long tap roots early in its development. This deep anchor root is sensitive to physical disturbance. When gardeners buy potted nursery starts or attempt to transplant young dill plants, the taproot is frequently bent or damaged. Gardeners who transplant established roots often experience stunted growth, premature flowering, or complete plant failure. For the strongest root development, seeds are best sown directly into the garden bed or permanent container where the crop will mature.
When to Sow Dill Outdoors
Sow dill seeds outdoors in mid to late spring, roughly one to two weeks after the last expected spring frost date, once the soil has warmed to at least 60°F (15°C). In regions with mild winters and hot summers, gardeners often sow seeds in early autumn for a winter or early spring harvest.
Step-by-Step Direct Sowing Technique
Follow these practical steps when you sow directly in your garden:
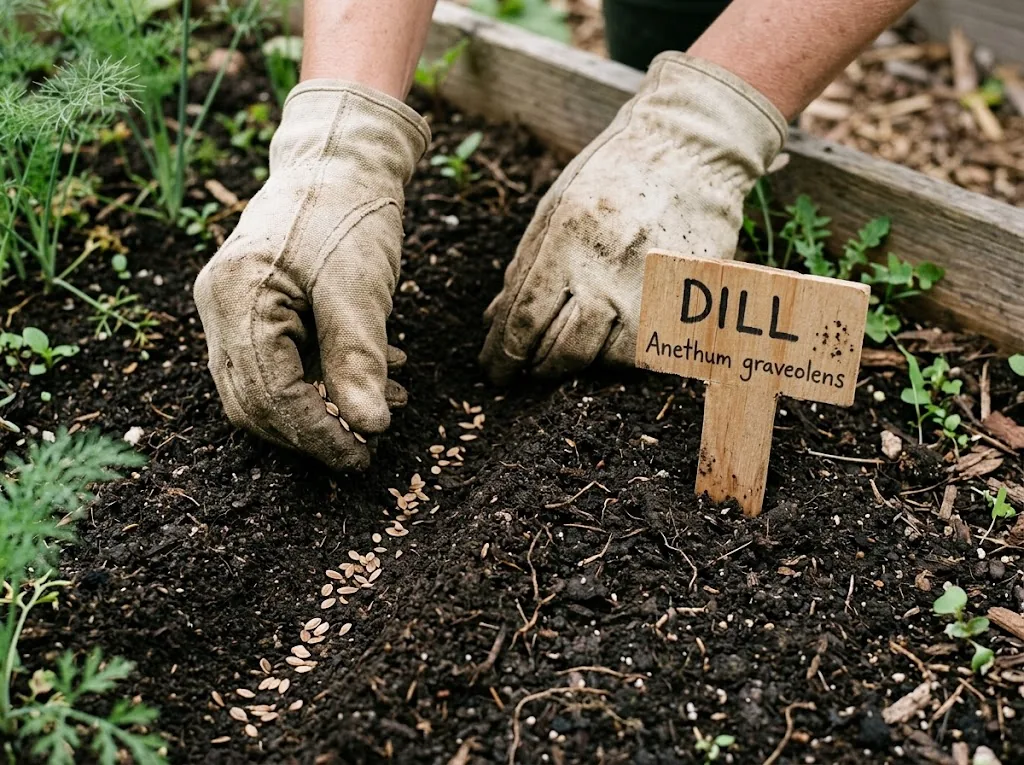
- Sow seeds shallowly: The seeds require light to trigger germination. Scatter seeds thinly across the bed or plant seeds in rows 12 to 18 inches apart, covering them with no more than 1/8 to 1/4 inch of fine compost.
- Water gently: Moisten the soil surface using a gentle spray nozzle so you do not wash tiny seeds away.
- Maintain moisture: Keep the soil consistently moist until germination occurs, which typically takes 10 to 14 days.
- Thin the seedlings: When young dill seedlings reach 2 to 3 inches tall, thin them to stand 10 to 12 inches separated. Use clean snips to cut unwanted sprouts at the soil line rather than pulling them, which protects neighboring roots.
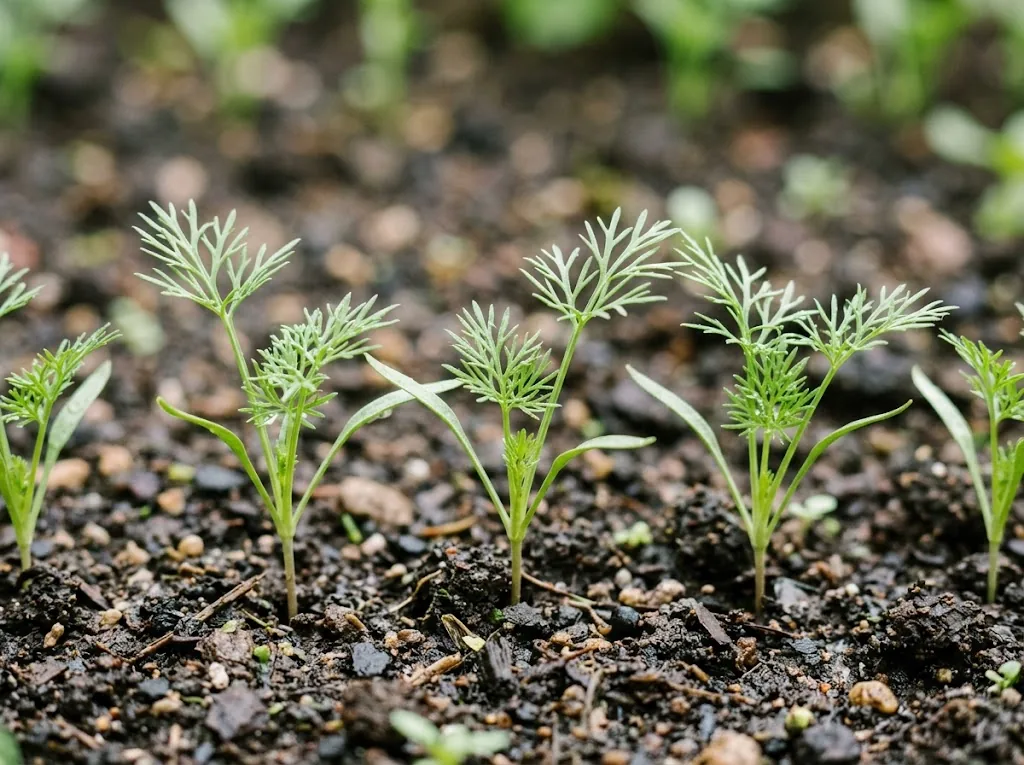
Succession Sowing for a Continuous Harvest
Because individual plants produce tender foliage for a limited window before forming flowers, experienced gardeners sow seeds every few weeks throughout late spring and early summer. Sowing a fresh row every 14 to 21 days will ensure a season-long fresh supply of dill weed right through autumn pickle making season.
Container Growing and Indoor Cultivation
If you lack garden bed space, container growing is a convenient and productive way to grow dill on patios, decks, or sunny window sills.
Selecting the Right Pot
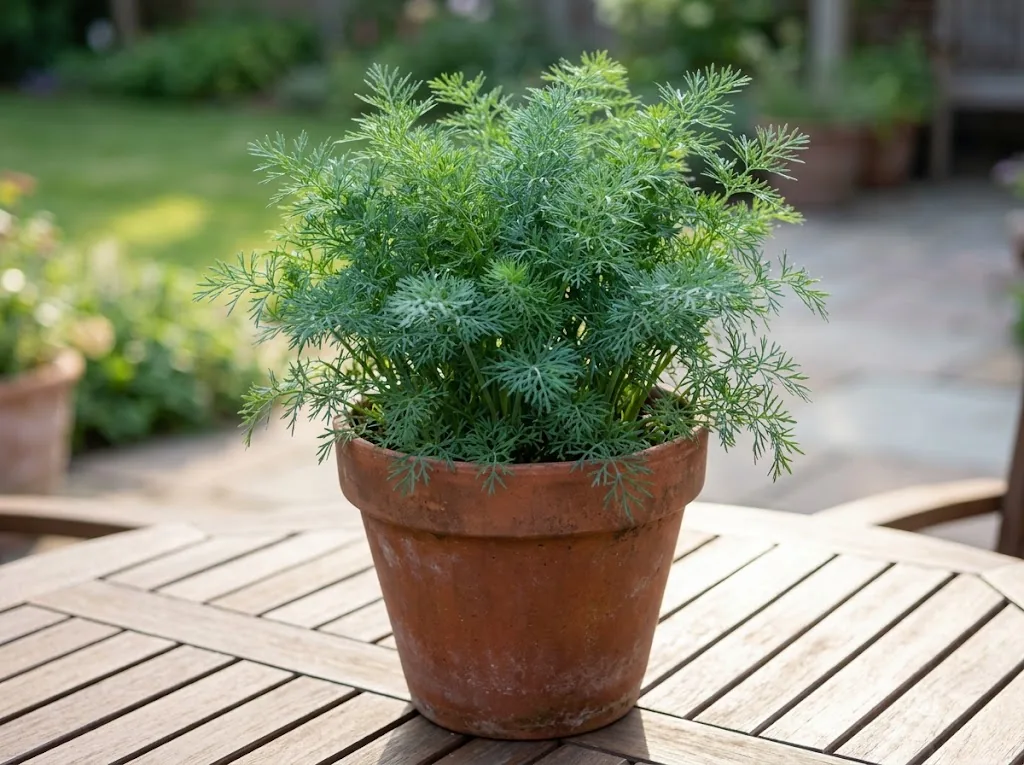
Because of the deep taproot, choose a deep container measuring at least 10 to 12 inches in depth and width. Ensure the pot has multiple drainage holes at the base. Terracotta, glazed ceramic, and fabric grow bags all work well.
Potting Mix and Container Care
Fill containers with a premium, well-draining potting mix enriched with perlite and organic compost. Container-grown plants dry out significantly faster than in-ground garden beds, especially during warm weather. Check moisture daily and water whenever the top inch of potting soil feels dry to the touch.
Growing Indoors
To cultivate dill indoors, place your container on a south-facing windowsill that receives maximum daily sun. During darker winter months, supplement natural light with an LED grow light positioned 4 to 6 inches above the leaves for 12 to 14 hours daily to prevent spindly, weak stems.
Best Cultivars for Containers
Standard garden types can quickly outgrow small pots. For container gardening, look for compact cultivars:
- Fernleaf: An All-America Selections winner that grows into a bushy, compact plant (18 inches tall) and is exceptionally slow to bolt.
- Dukat: A variety renowned for high essential oil content, dense fine leaves, and excellent leaf yield before flowering.
- Teddy: A dwarf variety featuring dense, finely divided leaves that thrives in small window boxes and patio planters.
- Bouquet: The most popular standard variety, widely grown for its large yellow flower heads and flavorful dill seeds used in home pickling.
Ongoing Plant Care and Maintenance
Once established, this crop requires minimal day-to-day maintenance beyond routine watering and basic weed control.
Watering Guidelines
Provide about one inch of water per week through rainfall or supplemental irrigation. Keep soil evenly moist while plants are actively developing leaves. While established plants can withstand brief dry periods, chronic drought stress triggers rapid blooming and diminishes leaf quality. Always apply water directly to the soil base to keep delicate leaves dry and reduce fungal risk.
Soil Nutrition and Feeding
This annual is a light feeder that requires modest nutrients. In rich garden soil amended with organic compost, supplemental feeding is rarely necessary. Excess nitrogen promotes rapid vegetative growth but dilutes the essential oils that give the herb its signature taste and aroma. In containers or nutrient-poor soil, apply a light feeding of a balanced 5-10-5 fertilizer or use a liquid fertilizer diluted to half strength every four to six weeks during the active growing season.
Mulching and Weed Control
Apply a one-inch layer of clean straw, shredded bark, or leaf mulch around the base of your plants. Mulch conserves soil moisture, cools the root zone during hot summer afternoons, and suppresses competing weeds that could choke a delicate young seedling.
Companion Planting and Garden Benefits
Integrating this crop into your wider garden layout provides significant ecological benefits while improving crop resilience.
Beneficial Companions
This crop is an outstanding companion plant for several key garden vegetables:
- Brassica vegetables: Plant dill near cabbage, broccoli, kale, cauliflower, and Brussels sprouts. The aromatic leaves emit natural compounds that help deter common brassica pests, while open blossoms attract beneficial predatory wasps and hoverflies that feed on cabbage loopers and aphids.
- Cucumbers: Dill and cucumber vines are classic garden partners, sharing similar moisture requirements and maturing together just in time to make dill pickles and cucumber pickle jars.
- Lettuce and Onions: Shallow-rooted greens and alliums fit neatly between crop groupings without competing for deep soil nutrients.
Plants to Keep Away from Dill
Certain garden plants should never share a bed with this crop:
- Fennel: Never plant dill near fennel (Foeniculum vulgare). Though botanically distinct, the two plants look and smell similar, and growing them side by side makes it easy to mix up seedlings and can taint the flavor of home-saved seed.
- Carrots: Because both belong to the Apiaceae family, carrot roots attract the same pests, including the carrot rust fly, and can compete intensely for underground root space.
- Nightshades: While young plants do not harm tomatoes, mature flowering stems can stunt tomato vine growth and attract tomato hornworms.
Attracting Pollinators and Wildlife
When you allow flowers to grow, yellow blooms become a magnet for every beneficial pollinator. The flat, nectar-rich umbels provide easy landing platforms for honeybees, bumblebees, lacewings, and ladybugs. Furthermore, the crop is a primary larval host plant for the black swallowtail butterfly (Papilio polyxenes). If you notice colorful green, black, and yellow striped caterpillars feeding on the leaves, consider sharing a few stems to support local butterfly populations.

Managing Common Pests and Plant Diseases
While generally pest-resistant thanks to pungent aromatic oils, a few common garden issues can arise.
Managing Aphids on Tender Shoots
Tiny green or black aphid clusters occasionally gather on tender new shoots and underneath lacy leaves. If aphid pressure builds, blast them off with a strong jet of water from your garden hose, or apply an organic insecticidal soap spray during early morning hours.
Damping Off and Fungal Blight
Overwatered seedlings in cold, waterlogged soil can collapse from damping-off fungi. Prevent fungal issues by ensuring excellent soil drainage, spacing plants properly to promote air circulation, and avoiding overhead watering.
Premature Bolting
When weather warms abruptly in early summer, plants respond by rapidly sending up a central flower stalk and shifting energy from leaf production to seed formation. Once flowering starts, leaf production slows and stems turn slightly bitter. To delay bolting, keep soil cool with mulch, provide consistent moisture, pinch early flower buds, and practice succession sowing.
Harvesting Dill Weed and Collecting Seeds
This crop provides two distinct harvests from a single planting: fresh green leaves, known culinarily as dill weed, and dried mature seeds.
Harvesting Fresh Dill Weed Leaves
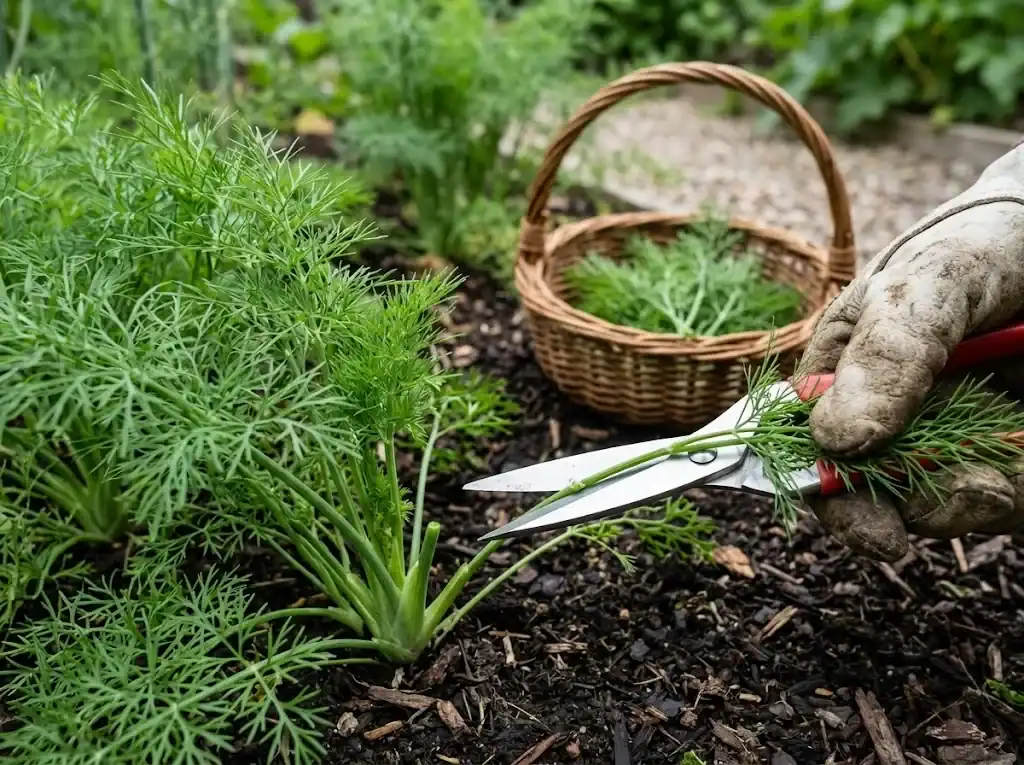
You can begin to harvest leaves as soon as the plant has developed 4 to 5 robust branches, usually 40 to 50 days after sowing. For optimal flavor and aroma, harvest in the morning after dew has evaporated but before the heat of midday sun. Learn precise cutting techniques in our dedicated guide on how to harvest dill properly without harming future stem growth.
Collecting and Drying Dill Seeds
If your goal is to harvest aromatic dill seeds for cooking, baking, and homemade pickle brine, allow plants to flower and go to seed toward the end of summer. The yellow umbel blossoms will give way to green seed clusters that gradually turn brown and dry on the stem.
When roughly two-thirds of the seeds in a flower head have turned tan or brown, cut the entire stem just below the seed cluster. Invert the heads inside a clean paper bag, tie the pouch around the stems with twine, and hang it upside down in a warm, dry, well-ventilated room. As the flower heads dry completely over 10 to 14 days, the container will catch the seeds as they naturally release. To store your harvest for culinary use throughout winter, consult our detailed walkthrough on how to store dill after harvesting.

Frequently Asked Questions About Growing Dill
Does dill do better in pots or in the ground?
The plant grows well in both environments, but in-ground garden beds allow its deep taproot to develop without constraint, resulting in larger, more drought-resilient plants. If growing in pots, use a deep container measuring at least 10 to 12 inches deep and select compact, bolt-resistant cultivars such as Fernleaf or Teddy.
How do you cut dill so it keeps growing?
Always snip outer leaves near the base of the main stem using clean pruning shears or sharp scissors, leaving the inner central growing crown untouched. Never remove more than one-third of total foliage at one time. Regular harvesting encourages branching and delays flower formation.
Does dill come back every year?
No, this is a true annual that completes its life cycle and dies after setting seed in autumn. However, because the plant readily self-seeds in garden beds, seeds that drop to the ground before winter will often naturally germinate the following spring, giving the impression of a perennial return.
What should you not plant dill next to?
Keep dill away from fennel because the two similar plants can easily be confused and growing them side by side can taint home-saved seed. You should also avoid planting next to carrots, which share common pests, and mature nightshades such as tomatoes, which can suffer stunted vine growth near mature plants.